Build a Digital Thermometer with Arduino
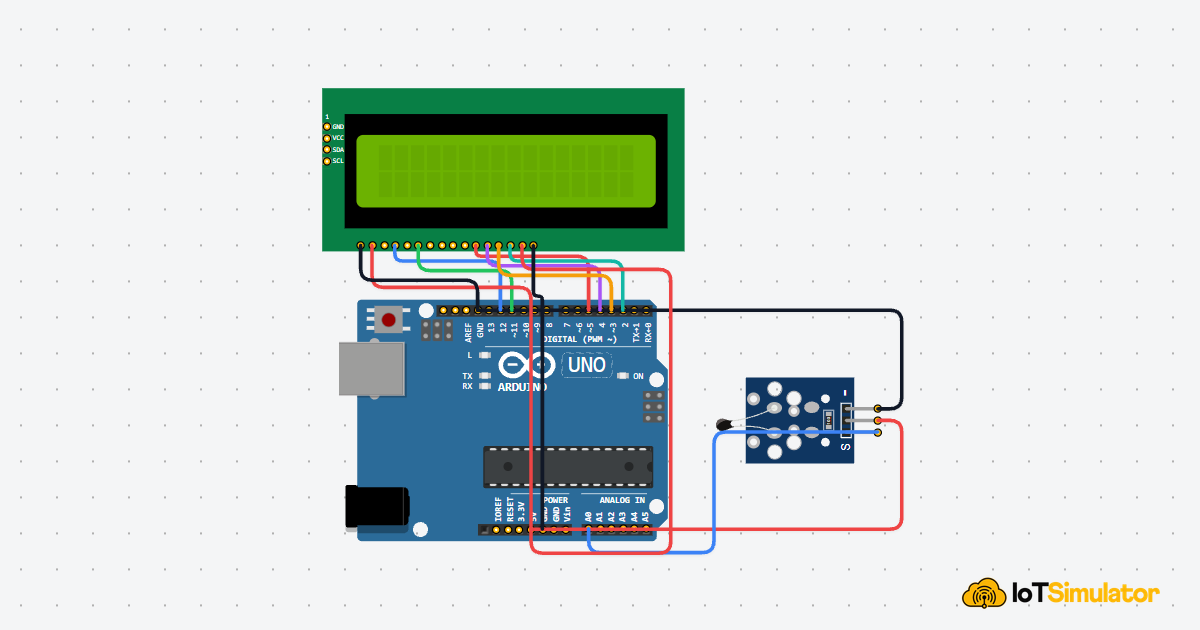
In this project you will wire an NTC temperature sensor and an LCD1602 display to your Arduino. The sensor reads the room temperature as a voltage, the Arduino converts that voltage into Celsius, and the LCD shows the result live — no computer screen needed.
Live project track
Have you ever looked at a digital thermometer and wondered how it turns heat into a number? In this project, you will build exactly that — a sensor reads the room temperature and your Arduino shows it live on a small LCD screen. No guessing, no serial monitor — the result is right there on the display.
This is a great second project because it combines two new components working together: a sensor that reads the physical world, and a display that shows the result. Once you understand this pattern, you can swap the sensor for almost anything.
Why a Resistor That Changes With Temperature Becomes a Thermometer
The NTC temperature sensor contains a special type of resistor called a thermistor. What makes it special is that its resistance is not fixed — it goes down as the temperature goes up. At room temperature it might have 10,000 ohms of resistance. At 50°C it might drop to 3,000 ohms.
On its own, a changing resistance is hard for the Arduino to measure. The Arduino can only read voltages, not resistance directly. So the sensor module includes a second fixed resistor that works together with the thermistor in a circuit called a voltage divider. As the thermistor resistance changes, the voltage at the midpoint of the divider changes with it — and that voltage is what the Arduino reads on pin A0.
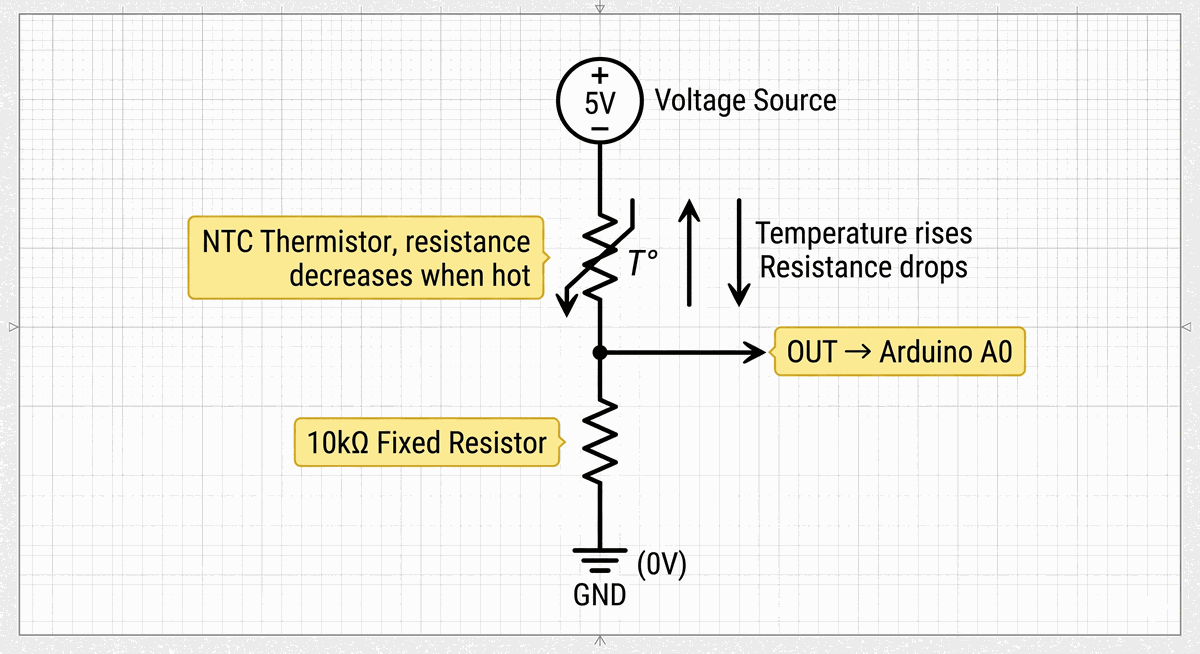
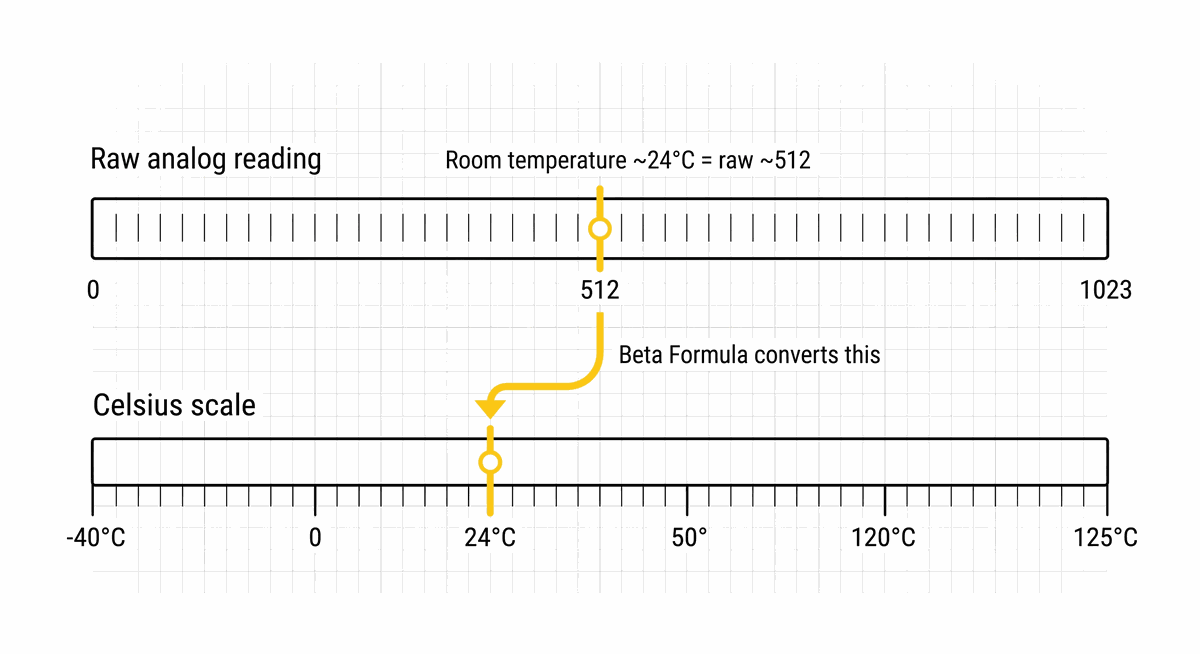
What a Raw Reading of 512 Actually Means
When the Arduino reads pin A0 with analogRead(), it returns a number between 0 and 1023. This number represents a voltage between 0V and 5V. A reading of 0 means 0V. A reading of 1023 means 5V. A reading of 512 means approximately 2.5V — right in the middle.
Room temperature (about 24°C) produces roughly that midpoint voltage. A hot environment pushes the reading lower because the thermistor resistance drops, shifting the voltage divider output. A cold environment pushes it higher. The raw number alone doesn't tell you the temperature — you need a formula to convert it.
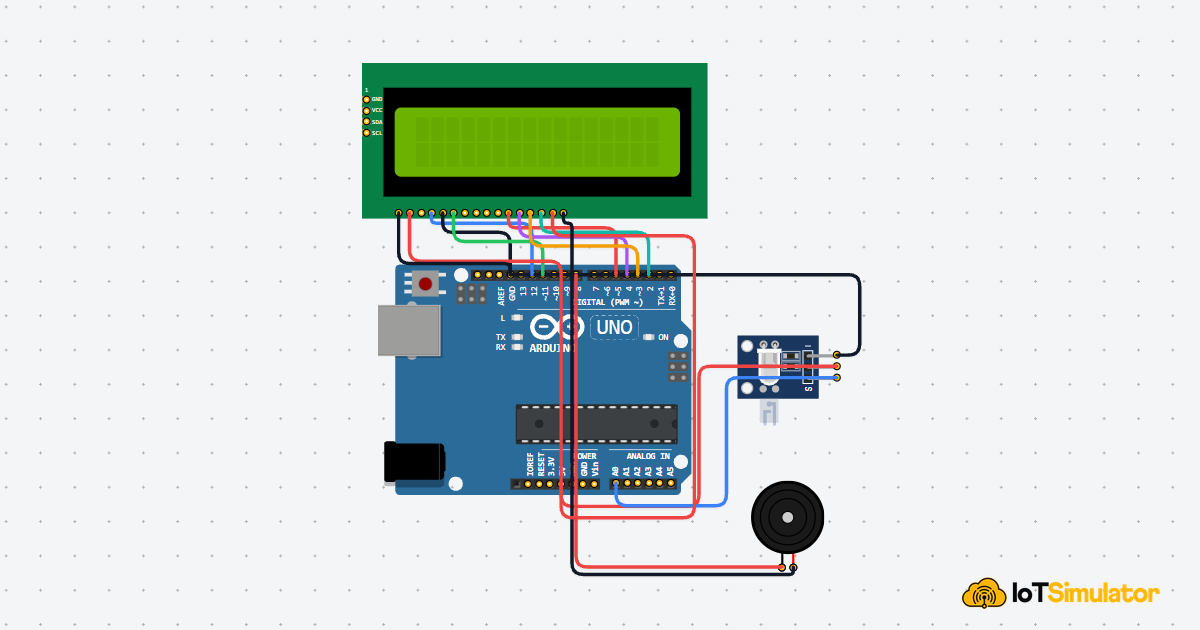
Wiring Two Components to One Arduino
This project uses more wires than a single-component project, but each connection has a clear purpose. The NTC sensor needs only three wires: power, ground, and the analog signal. The LCD needs more because it uses four data lines plus control and power pins.
Powers the sensor module.
Shared ground reference.
Analog temperature signal into the Arduino.
Ground for the display logic.
Power for the display logic.
Tells the LCD if what's coming is data or a command.
Triggers the LCD to read the current data.
Data line 1 of 4 in 4-bit mode.
Data line 2 of 4 in 4-bit mode.
Data line 3 of 4 in 4-bit mode.
Data line 4 of 4 in 4-bit mode.
Backlight power.
Backlight ground.
If the LCD shows nothing after wiring, the most common cause is that the contrast pin (V0) is not connected. In this project the LCD module handles contrast internally, but if yours shows blank characters, try connecting V0 to GND through a 1kΩ resistor.
The Beta Formula That Converts Voltage to Celsius
The raw value from analogRead() is just a number — 0 to 1023. To turn it into degrees Celsius, the code uses what is called the Beta formula, which is a mathematical model of how NTC thermistors behave across a temperature range. The formula uses a constant called BETA (typically 3950 for the common NTC modules) to describe the curve of the thermistor.
You do not need to understand the full math to use it. What matters is the constant: if you change BETA, the readings shift. Most hobby NTC modules use 3950. If your readings seem off by a few degrees, try adjusting this constant slightly up or down.
Why lcd.clear() Causes Flicker and How to Fix It
In the code above, lcd.clear() is called every second before printing new values. This works correctly, but it can cause a brief flicker because clearing the screen takes a moment, leaving a gap where nothing is displayed. If you notice flickering, the fix is to not clear the screen — instead, always print to the same cursor position and add trailing spaces after the number to overwrite any leftover characters from a longer previous value.
Why the Status Label on Row 2 Needs Padding
The second row shows a comfort label: Cool, Comfortable, or Warm. "Comfortable" is 11 characters. "Cool" is only 4. If the reading switches from Comfortable to Cool without clearing, the LCD will show "Coolortable" — the leftover characters stay visible. The fix is the same: add trailing spaces after the shorter label to overwrite the longer one.
Taking It Further
Once the thermometer is working, here are some natural next steps:
- Add a buzzer that beeps when the temperature goes above a limit you set — turning the thermometer into an alarm.
- Store the highest and lowest readings since power-on and show them on the second LCD row.
- Replace the NTC sensor with a DHT22 to also display humidity alongside temperature.
- Add a potentiometer to let the user dial in their own temperature threshold for the alarm.