Build a Mini Stopwatch Using Arduino
Build a beginner-friendly mini stopwatch with an Arduino Uno, two push buttons, and an LCD1602 display. One button starts and stops the timer, the other resets it, and the LCD shows elapsed seconds with a simple tenths-of-a-second display.
Live project track
A stopwatch is easy to understand before we even talk about electronics. Press start, time begins moving. Press stop, the number freezes. Press reset, everything goes back to zero. That familiar behavior makes this a friendly project for learning how buttons can control a program.
In this project, you will build a mini stopwatch with an Arduino Uno, two push buttons, and an LCD1602 display. The main concept is simple: the Arduino can remember a running or stopped state, then update the displayed time based on that state.
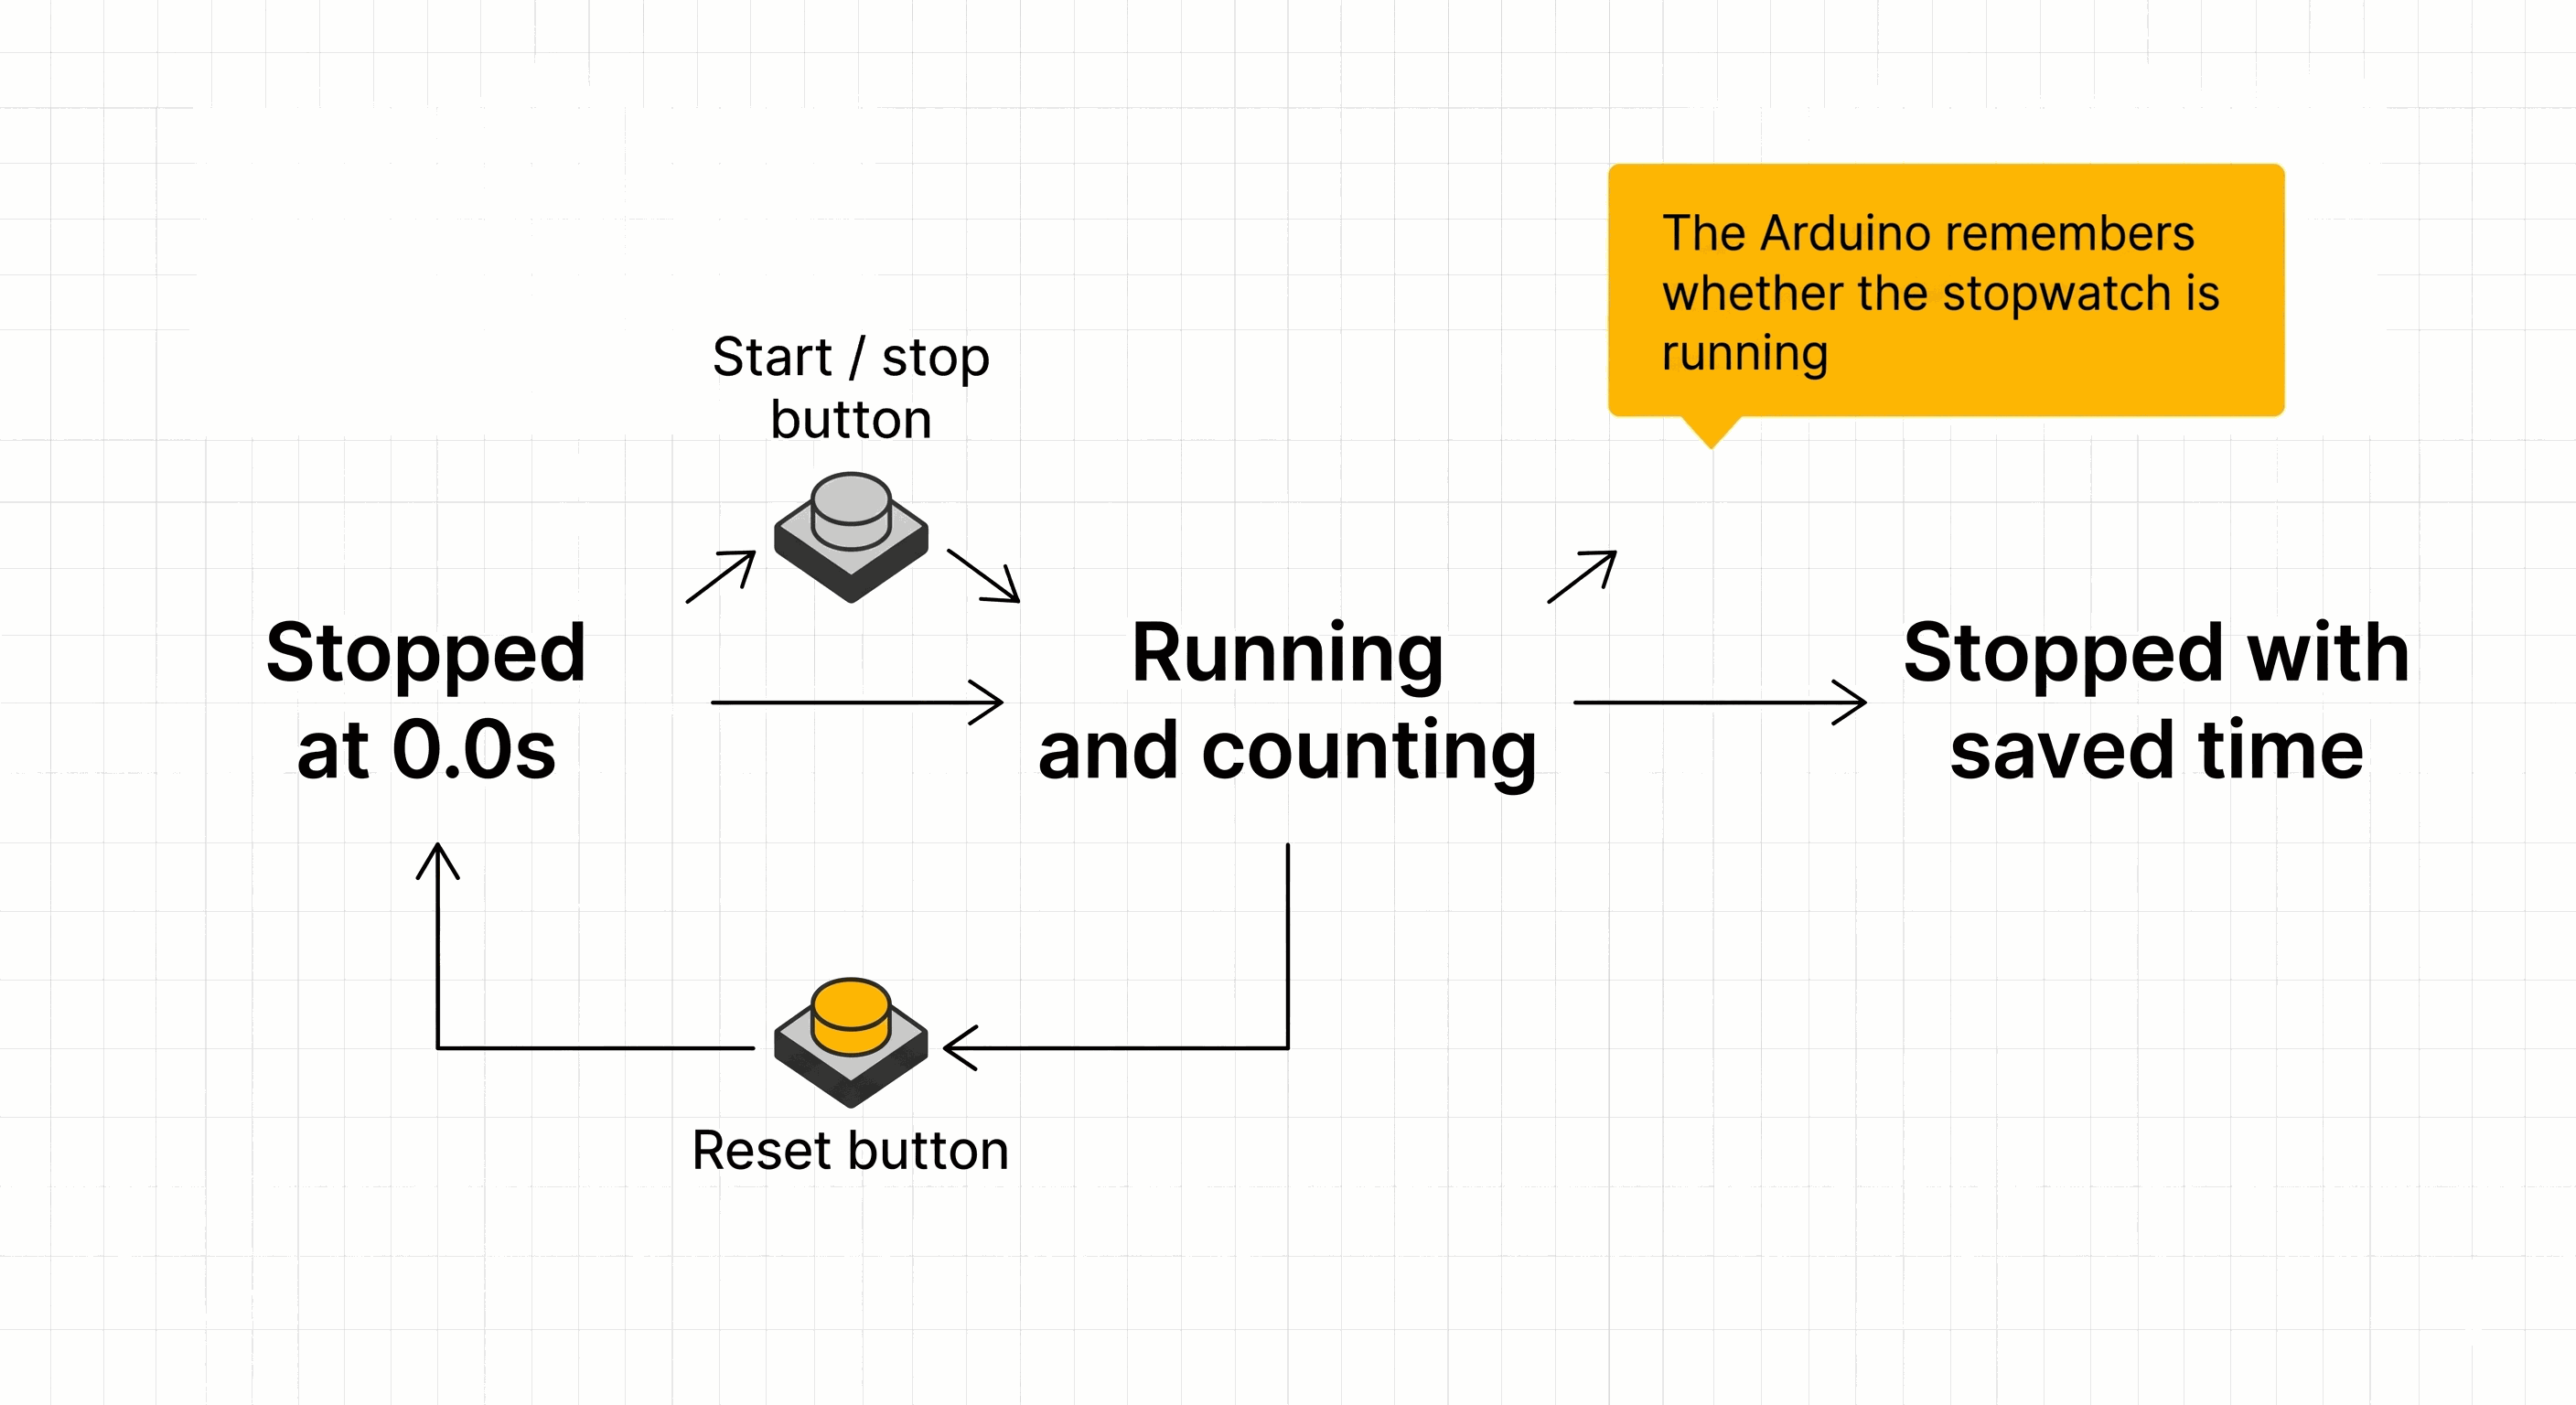
A Stopwatch Is a Memory Problem, Not Just a Clock
Think about a real stopwatch in your hand. It does not forget what it was doing between button presses. If it is running, it keeps counting. If it is stopped, it keeps showing the last time. If you reset it, it returns to zero and waits.
The Arduino needs the same small memory. In the code, that memory is a variable called running. When running is true, the stopwatch adds time. When running is false, the stopwatch does not add time. The LCD still updates so the reader can see whether the tool is running or stopped.
| User action | Arduino memory | LCD result |
|---|---|---|
| Press start/stop while stopped | running becomes true | Time starts increasing |
| Press start/stop while running | running becomes false | Time freezes |
| Press reset | running becomes false and time becomes zero | LCD shows 0.0 seconds |
This is the first important lesson: the button does not directly make the LCD count. The button changes the program's memory, and the program uses that memory to decide what to do next.
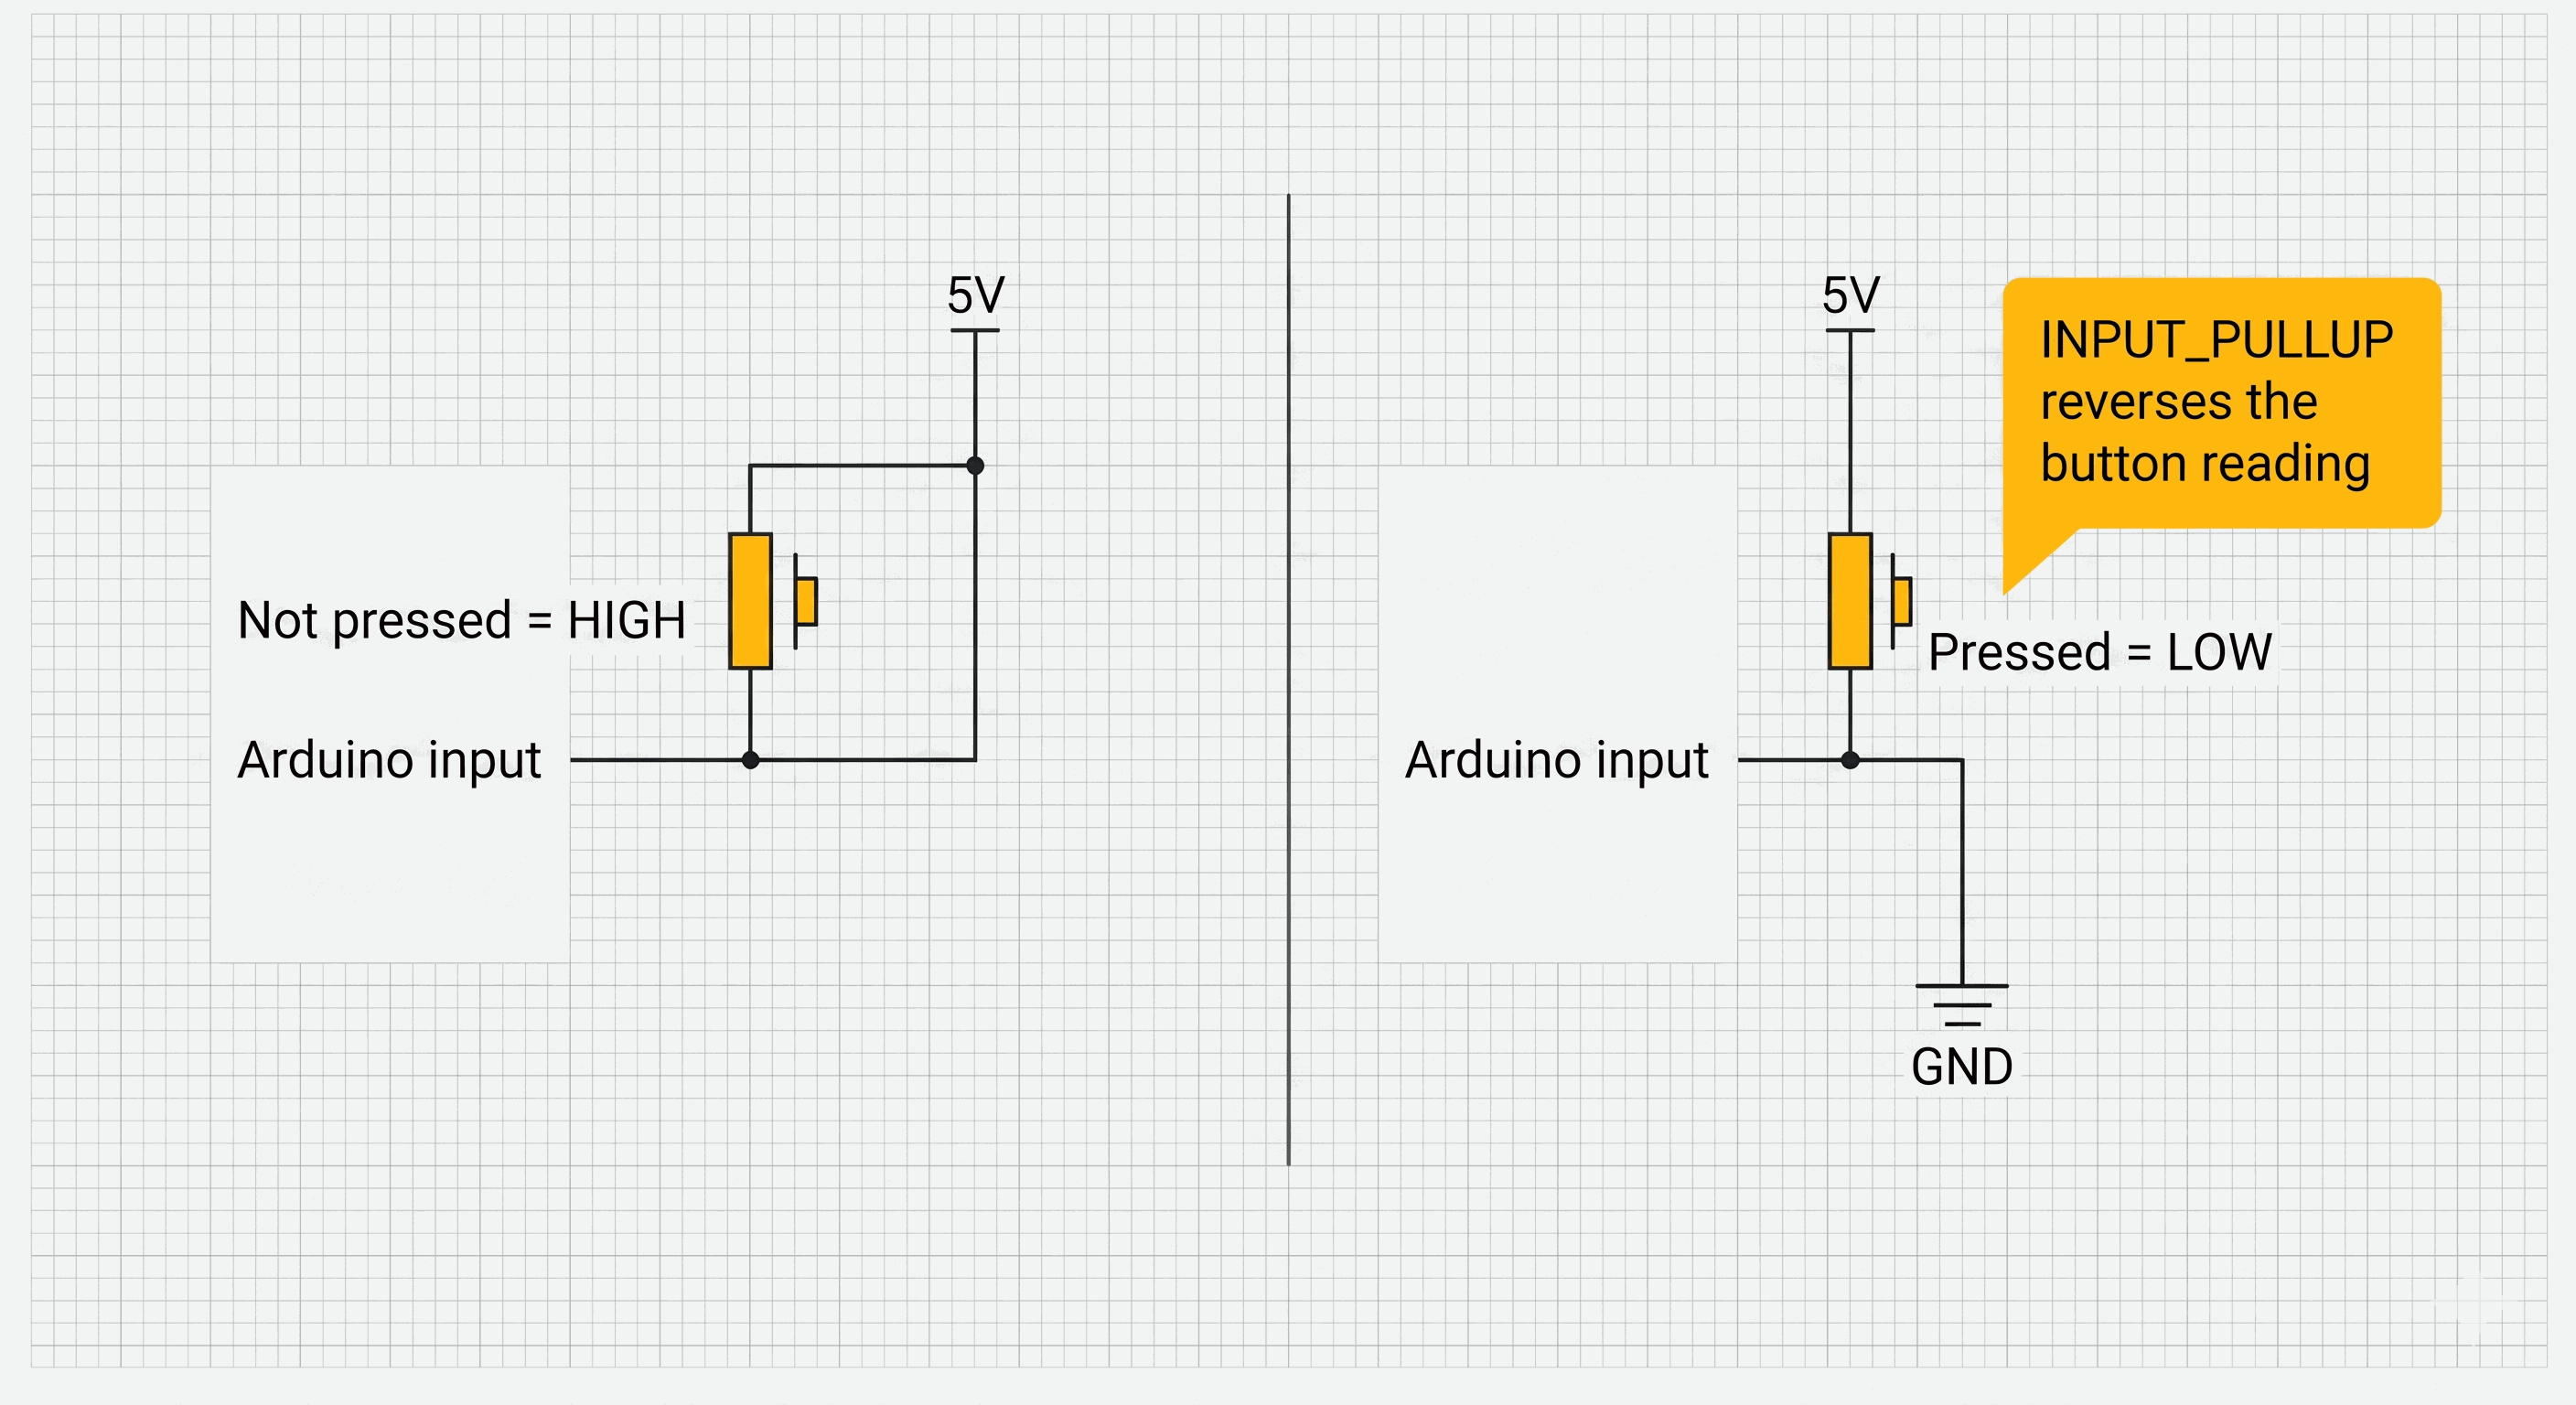
INPUT_PULLUP Makes the Button Read Backwards
Each button uses INPUT_PULLUP. That setting turns on a small resistor inside the Arduino so the input pin normally stays HIGH. HIGH means the pin is near 5V, so the Arduino reads it as on. When the button is pressed, it connects the pin to GND. GND is the return path for electricity, like the negative terminal of a battery, so the pin reads LOW.
This feels backwards at first: not pressed is HIGH, pressed is LOW. The advantage is that the wiring stays simple. Each button only needs one Arduino input pin and one GND connection.
With INPUT_PULLUP, the question is not "is the button HIGH?" The beginner-friendly question is "did the button pull the pin LOW?"The sketch uses that rule for both buttons. If the start/stop button reads LOW, the stopwatch switches between running and stopped. If the reset button reads LOW, the stopwatch stops and the counter returns to zero.
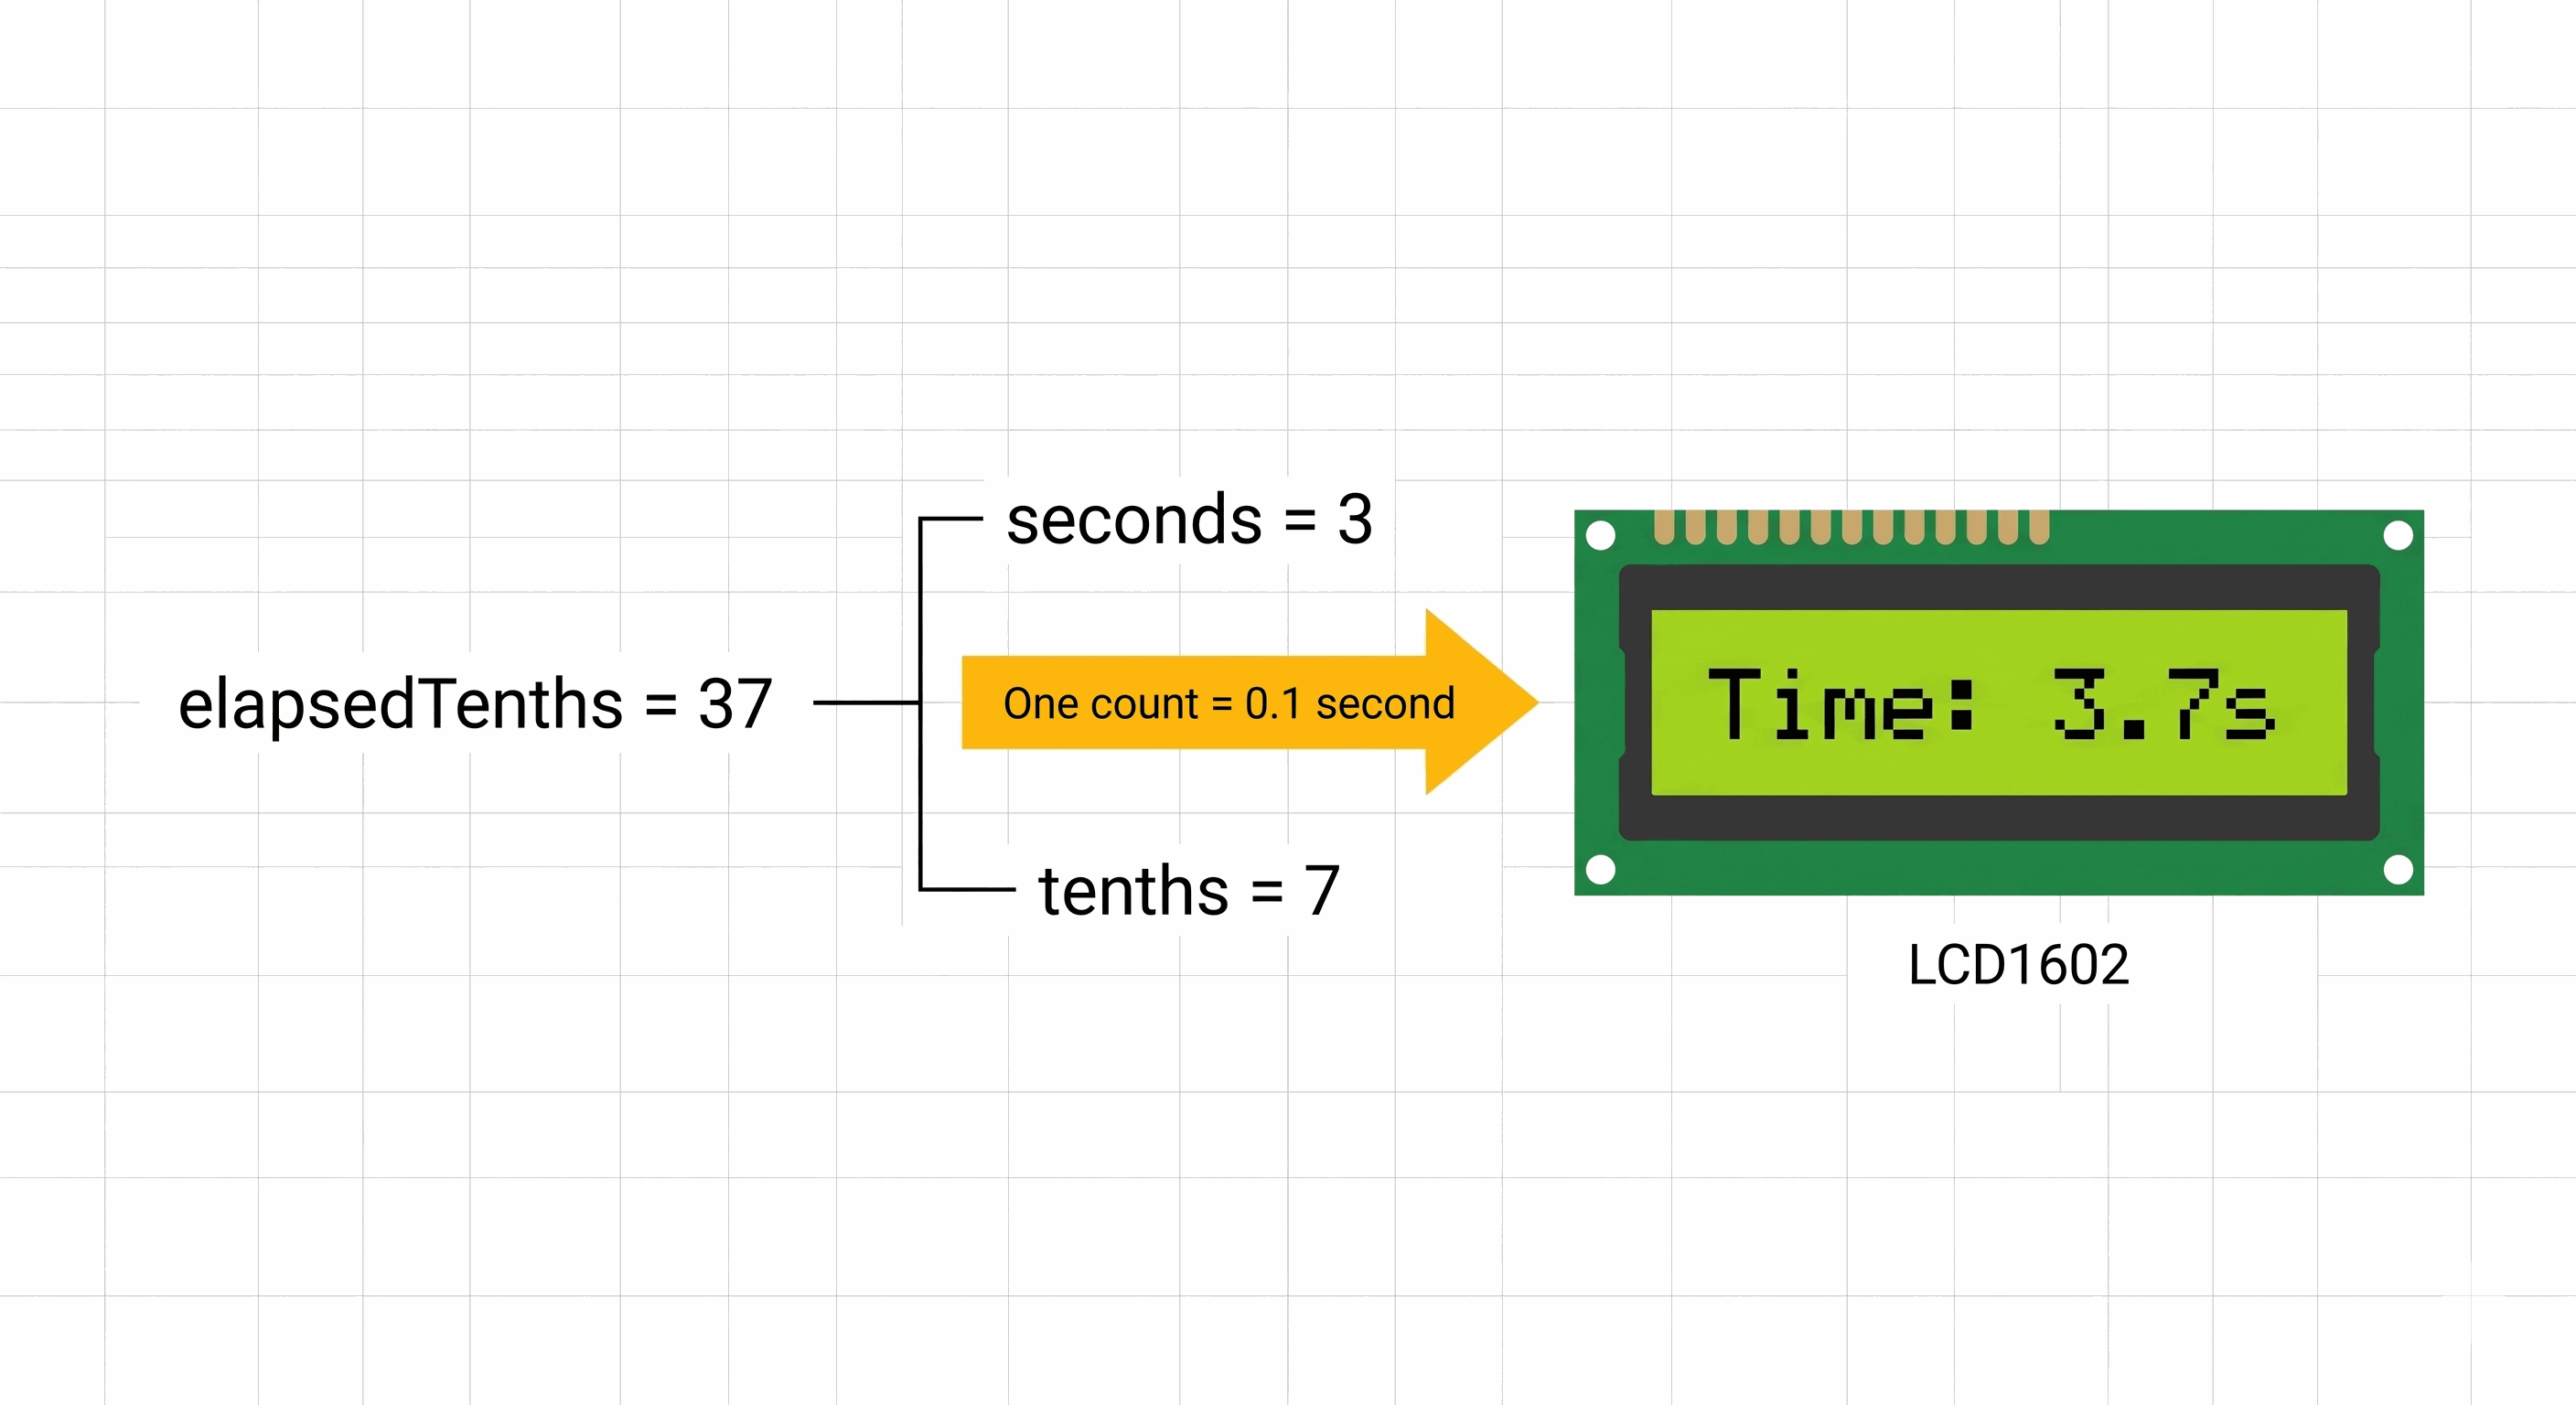
Tenths Make Time Visible With Simple Code
A polished stopwatch can use more precise timing with millis(), but this beginner version uses a simpler idea. When the stopwatch is running, the code waits 100 milliseconds and adds one to elapsedTenths. One tenth of a second is 0.1 seconds, so ten counts become one full second.
The LCD should not show the raw counter directly. If elapsedTenths is 37, that means 3.7 seconds. The code splits the counter into whole seconds and tenths, then prints them with a decimal point.
elapsedTenthsstores the total number of 0.1 second steps.secondsstores the whole seconds part.tenthsstores the single digit after the decimal point.
This is not a laboratory-grade stopwatch, and that is okay. It is designed to teach the control idea clearly: button input changes the stopwatch state, and the state decides whether time should advance.
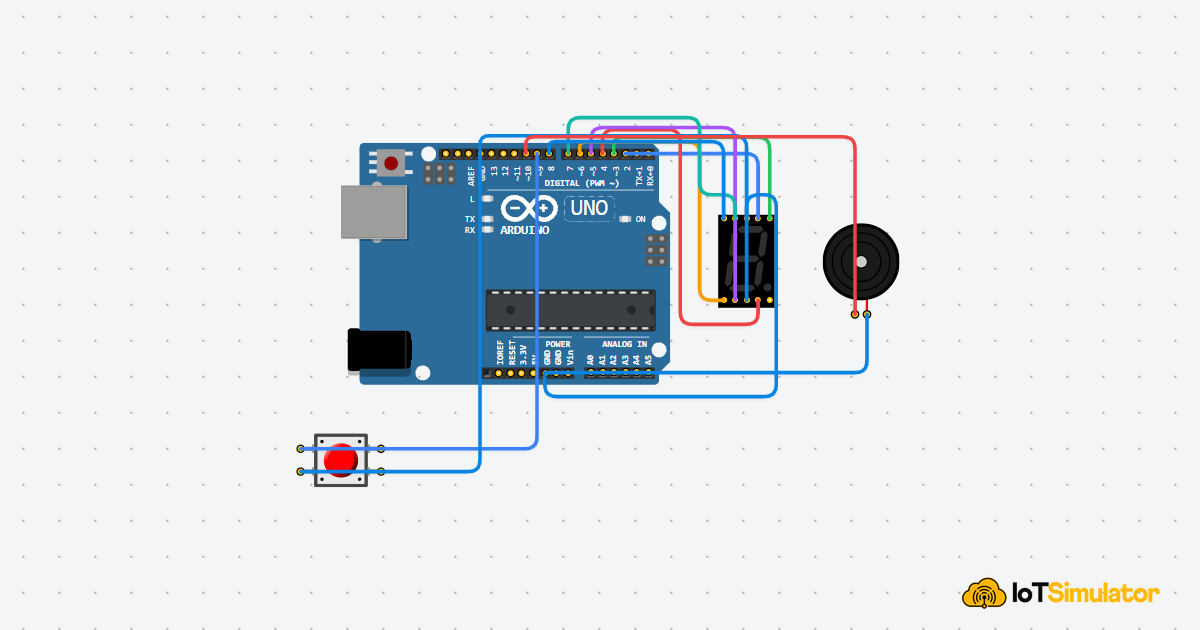
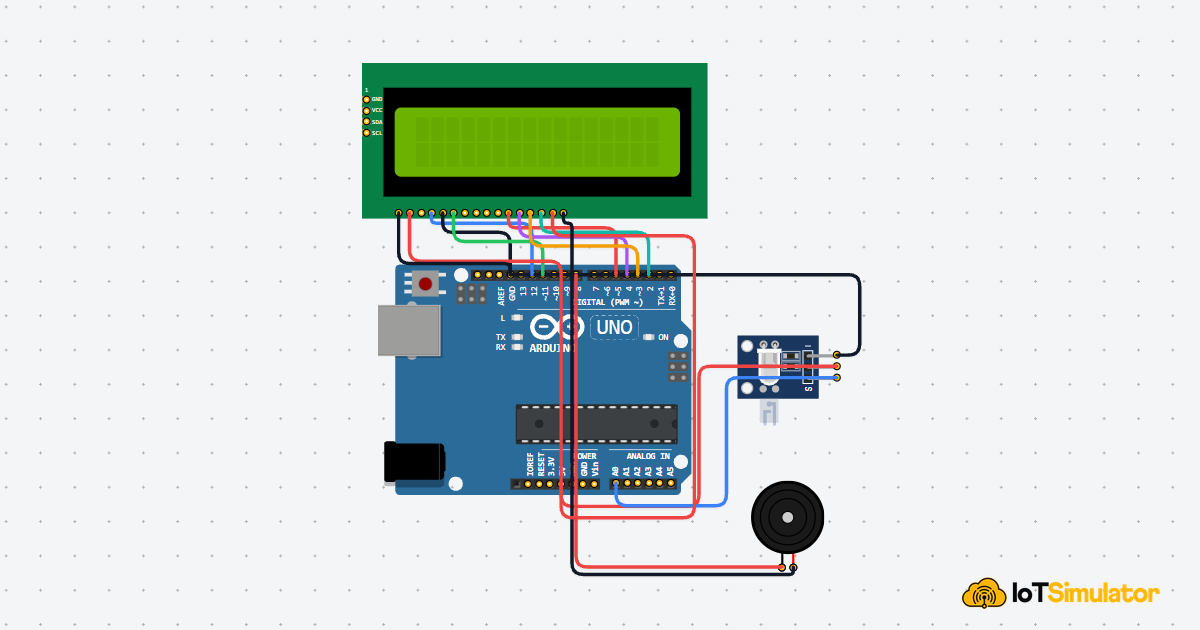
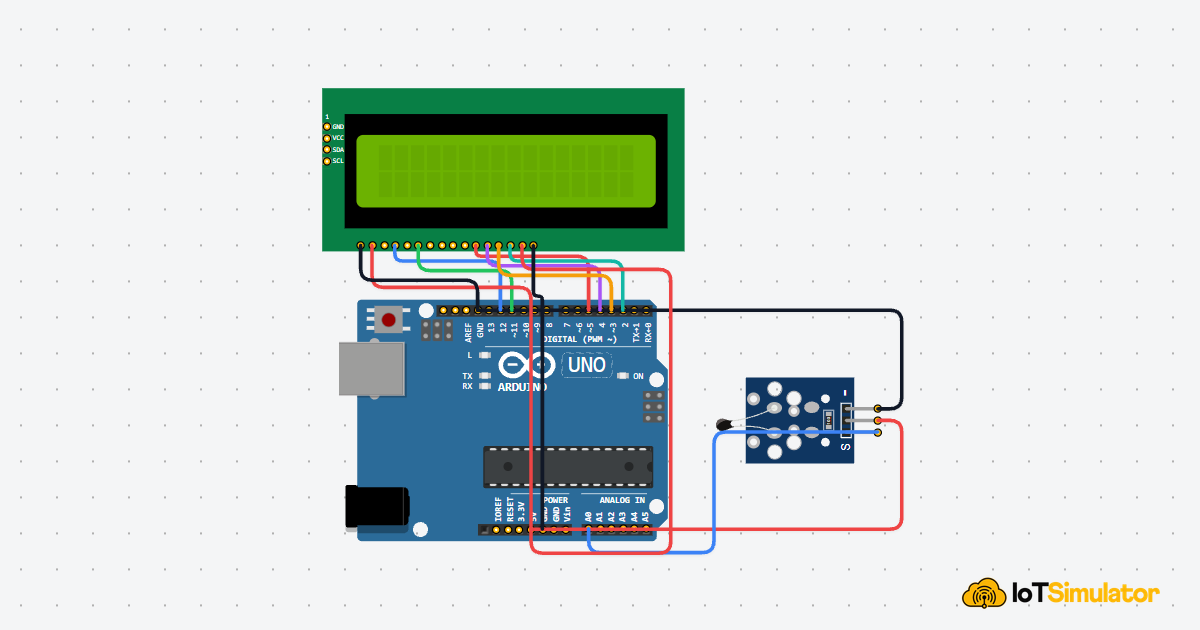
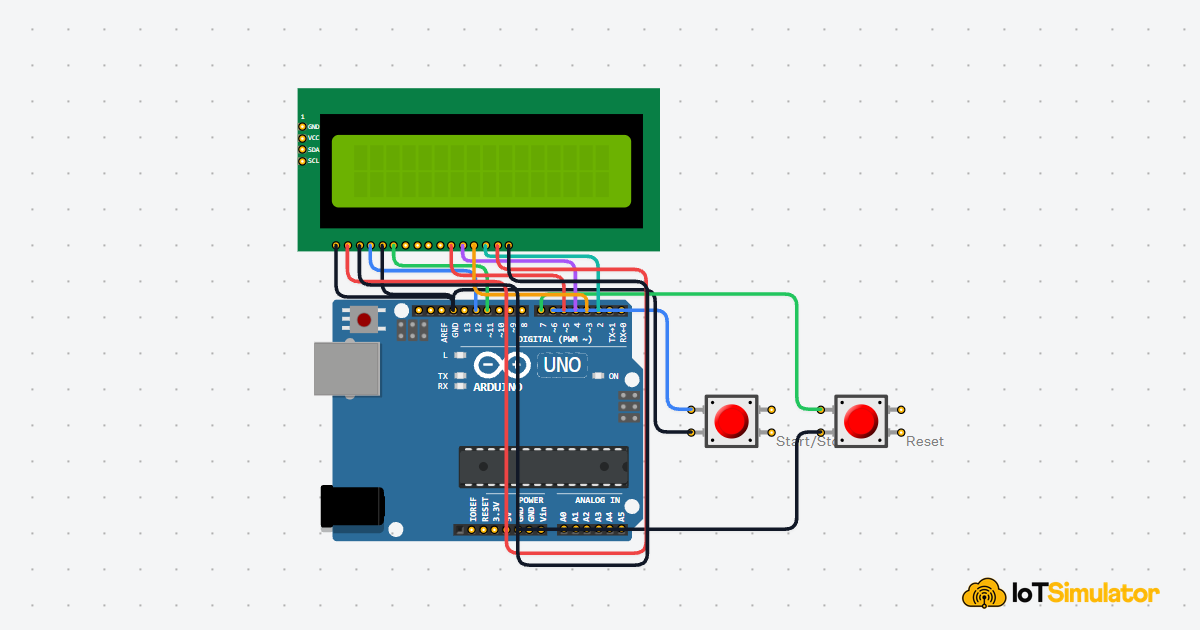
Two Buttons and One LCD Create the Stopwatch Controls
The circuit has three jobs. The start/stop button controls whether time should move. The reset button clears the saved time. The LCD shows the current time and the current mode.
5V is the positive power supply from the Arduino. The LCD uses it for its logic and backlight. GND is the shared return path. The buttons also connect to GND because the sketch uses INPUT_PULLUP, where a press pulls the input pin LOW.
Carries the start/stop button signal into the Arduino.
Pulls D6 LOW when the button is pressed.
Carries the reset button signal into the Arduino.
Pulls D7 LOW when the button is pressed.
Ground for the LCD logic.
Power for the LCD logic.
Sets a simple readable contrast level in this simulator circuit.
Keeps the LCD in write mode so Arduino sends text to it.
Chooses whether the LCD receives a command or display text.
Tells the LCD to accept the current data.
First data line used by the LCD in 4-bit mode.
Second data line used by the LCD in 4-bit mode.
Third data line used by the LCD in 4-bit mode.
Fourth data line used by the LCD in 4-bit mode.
Power for the LCD backlight.
Ground for the LCD backlight.
If a button seems to work backwards, that is normal with INPUT_PULLUP. Pressed reads LOW, not HIGH.The Complete Mini Stopwatch Sketch
This sketch keeps the code intentionally simple. It uses delay() for timing, two button inputs, one running flag, and one counter that stores tenths of a second. The result is easy to read and easy to modify.
A more accurate stopwatch would use millis(), but this beginner version focuses on the control pattern first: start, stop, reset, and display. The small button pause is a simple beginner-friendly way to avoid one quick tap being read many times.
How the Mini Stopwatch Code Works, Part By Part
Now let us break the sketch into smaller pieces. Each piece has one job: name the pins, prepare the LCD and buttons, respond to button presses, count time, and print the result.
▸ Mini Stopwatch Pins Name the Two Controls
The sketch starts by naming the two button pins and the six LCD pins. Pin numbers are the physical Arduino connectors used by the wires. Naming them at the top makes the wiring and code easier to compare.
▸ Stopwatch Variables Remember Time and Mode
running stores whether the stopwatch should count. elapsedTenths stores the elapsed time as tenths of a second. Keeping these values separate makes the logic easier: one variable answers "should I count?" and the other answers "how much time has passed?"
▸ Setup Turns On Pullup Buttons
In setup(), both button pins use INPUT_PULLUP. INPUT means the Arduino listens to the pin. The pullup part keeps the input stable without adding external resistors. The LCD also starts here with lcd.begin(16, 2), which tells the library the display has 16 columns and 2 rows.
▸ Start Button Flips the Running Flag
When the start/stop button reads LOW, the code changes running. If it was false, it becomes true. If it was true, it becomes false. The short button pause gives your finger time to lift so one quick tap does not get read many times.
▸ Reset Button Clears the Count
The reset button is more direct. It stops the stopwatch and sets elapsedTenths back to zero. That matches the behavior people expect: reset should not leave the timer running in the background.
▸ Running Mode Adds One Tenth
If running is true, the sketch waits 100 milliseconds and adds one to the counter. If the stopwatch is stopped, the sketch waits only a short idle delay before checking the buttons again.
▸ Counter Splits Into LCD Time
The counter is stored as tenths, but the LCD should show seconds and tenths. Integer division gives the whole seconds. Then the code subtracts those whole seconds from the original counter to get the one tenths digit.
▸ Second Row Shows the Current Mode
The second LCD row tells the learner whether the stopwatch is running or stopped. This tiny label is helpful because it confirms that the button press changed the program's memory, not just the number on the screen.
Making the Stopwatch Feel More Responsive
This beginner stopwatch is intentionally simple, so it counts in visible 0.1 second steps. After a button press, the code pauses briefly before reading again. That makes quick taps easier to handle, but it also means this version is more educational than ultra-precise.
When you are ready to go deeper, the next version should use millis(). That would let the Arduino check buttons and update time without pausing the whole sketch. For this first version, the simpler delay-based timing keeps the main idea easy to see.
Taking It Further
Once the basic stopwatch works, you can add a lap button that stores the current time without stopping the counter. You can also add a buzzer click when the start/stop button is pressed so the stopwatch gives both visual and audio feedback.
Another natural upgrade is a countdown timer. Instead of counting up from zero, the Arduino could start from a chosen number and count down until the LCD shows zero.