This article is a guide about the Buzzer. We will explain what kind of sound part it is, how it turns Arduino code into a tone, how to wire it with the correct polarity, and how to make a simple beep or melody from code.
Buzzer projects are useful when you want the board to make an audible response instead of only lighting an LED. That makes the part a good fit for alarms, countdowns, button feedback, reminders, and other small alerts that need to be heard right away.
By the end of this guide, you will know when to use a passive buzzer, why frequency matters, and how to turn one short beep into a tiny sound pattern that feels more like a real project.
Description
The buzzer is a piezoelectric sound device. In this simulator, it behaves like a passive piezo buzzer, which means the pitch comes from the signal you send to it. That is why frequency matters here: the Arduino is not just turning sound on and off, it is actually choosing how the buzzer vibrates.

This is not the same as a full speaker system. A buzzer is better for short alerts, timers, button feedback, and basic melodies than for rich music playback. If you want a clear yes-or-no sound response, the buzzer is usually the easier choice, because the sound starts and stops immediately when the code changes.
Most piezo buzzers are easy to drive directly from Arduino, which is why they show up in alarms, reminder devices, and beginner projects. The part is small, cheap, and easy to understand, so it is often one of the first sound outputs people try.
Types of Buzzers
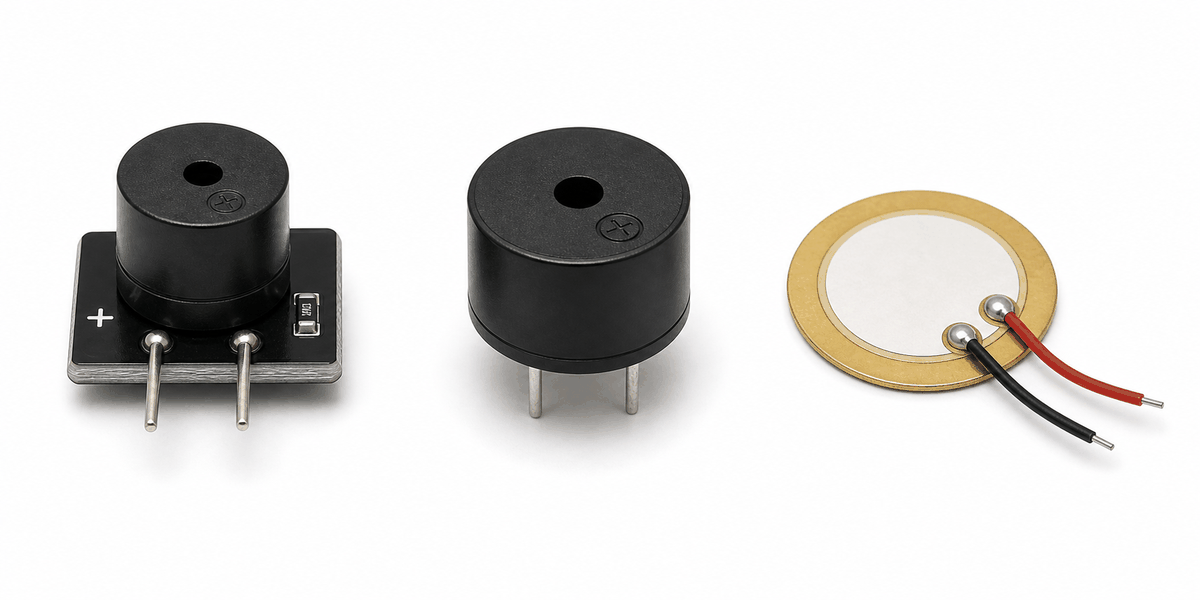
Not every buzzer behaves the same way. Some versions include a built-in oscillator and beep when you give them power, while others need a tone signal from the Arduino to make sound. A bare piezo sound element is even simpler, because it only vibrates when you drive it with the right waveform.

- Active buzzer: Has a built-in oscillator, so it can beep with a steady HIGH signal or direct power. This is the easiest type to use for simple alerts.
- Passive buzzer: Needs a changing tone signal from the Arduino. It gives you more control over pitch, which is why it works well for melodies and different beep patterns.
- Bare piezo sound element: A simple piezo disc or element without a full module. It usually needs more careful driving, but it shows the raw piezo behavior very clearly.
For an Arduino project, the difference matters because it changes the code and the wiring style. If you know whether the part is active, passive, or just a piezo sound element, you can choose the right pin strategy before you start debugging a silent circuit.
Features
Here are the main things to know about the Buzzer:
| Feature | What it means |
|---|---|
| Piezo sound output | Turns electrical pulses into audible sound. |
| Tone support | Works well with Arduino's tone() function. |
| Simple wiring | Usually only needs a signal pin and ground. |
| Good for alerts | Useful for alarms, beeps, countdowns, and simple feedback. |
| Melody friendly | Can play short musical patterns when the timing is set well. |
| Fast response | The sound starts as soon as the signal begins toggling. |
That simple sound feedback makes the buzzer easy to understand and easy to reuse in many beginner Arduino projects. It is one of those parts that feels small, but becomes very useful the moment a project needs an audible response.
How Does It Work?
The buzzer works by vibrating a small piezoelectric element when the Arduino sends a tone or switching signal. Those vibrations move the air around it, and that movement becomes the sound you hear.
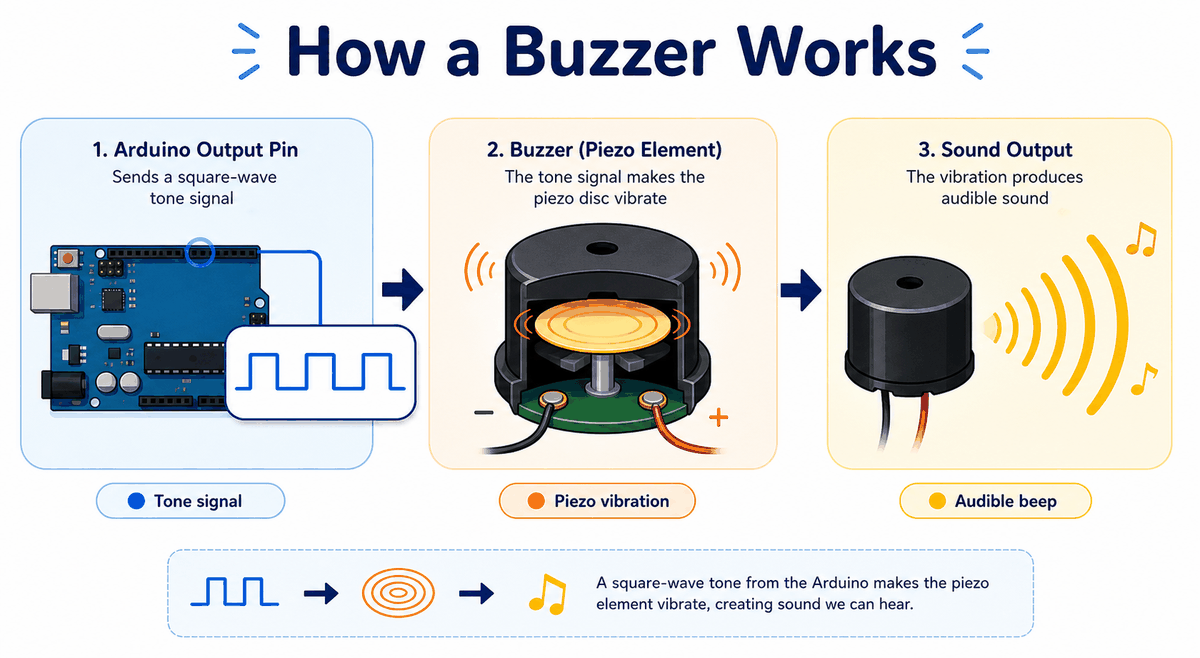
If you use Arduino's tone() function, the board generates a square wave at the chosen frequency. The buzzer turns that electrical pattern into sound. If you stop the tone with noTone(), the sound ends.
That is why the buzzer is so useful in a project. It can confirm a button press, warn about an event, or play a short melody without needing a complex audio system. In practice, the tone feels very direct: when the code starts, the sound starts; when the code stops, the sound stops.
Tone And NoTone
tone() starts the sound and chooses the pitch. noTone() stops it. Together, they give you an easy way to make a sound pattern in code.
Smooth Vs Accurate Mode
In this buzzer model, smooth mode is best for a clean single-tone or melody demo. Accurate mode is better when you want a more exact sound pattern, although it can feel less polished for simple tunes.
Arduino With Buzzer
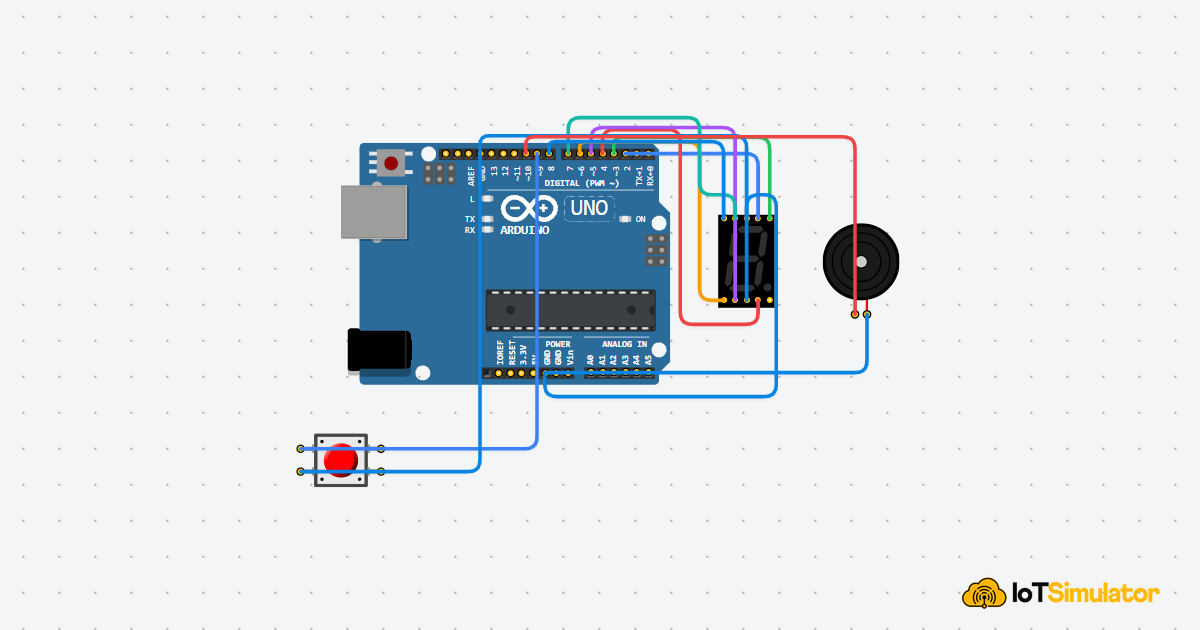
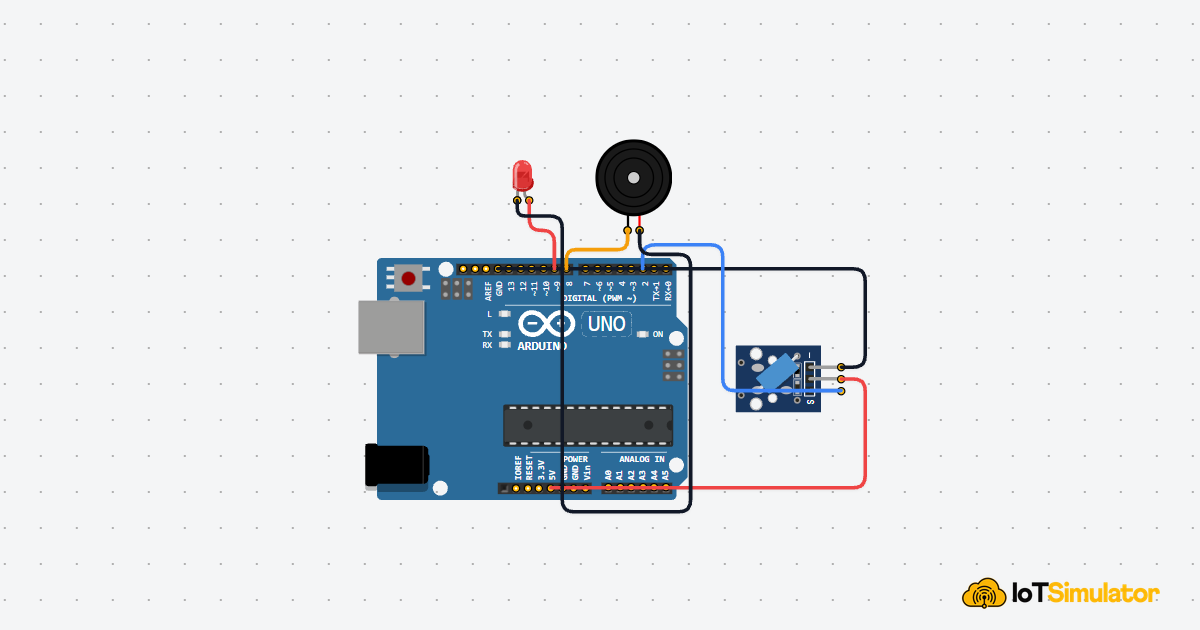
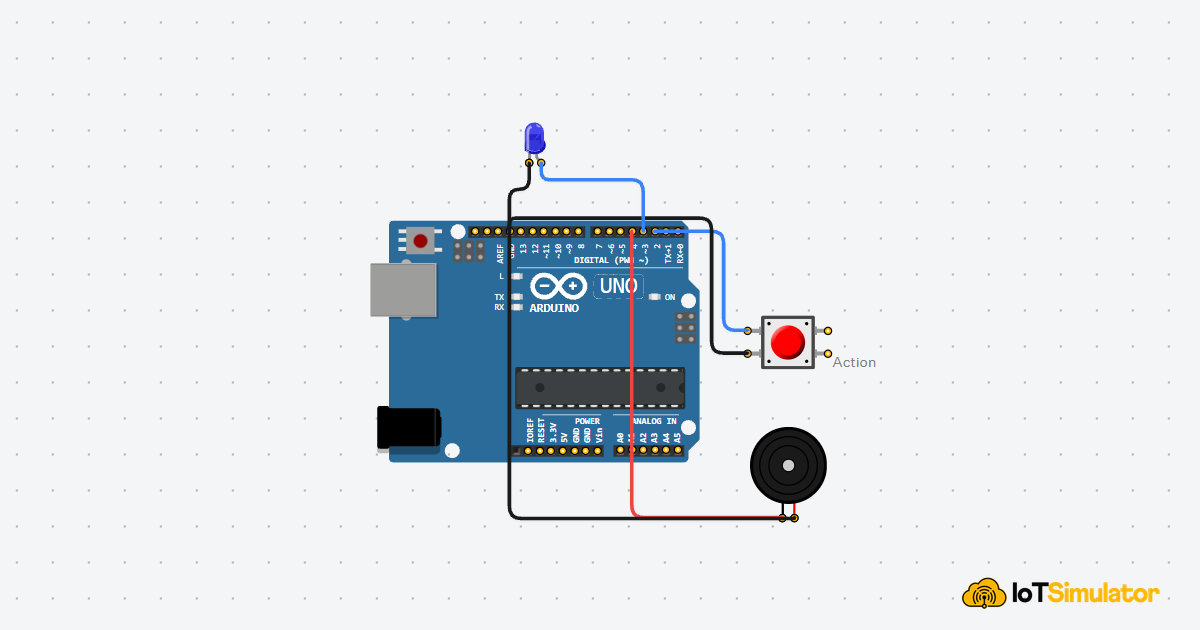
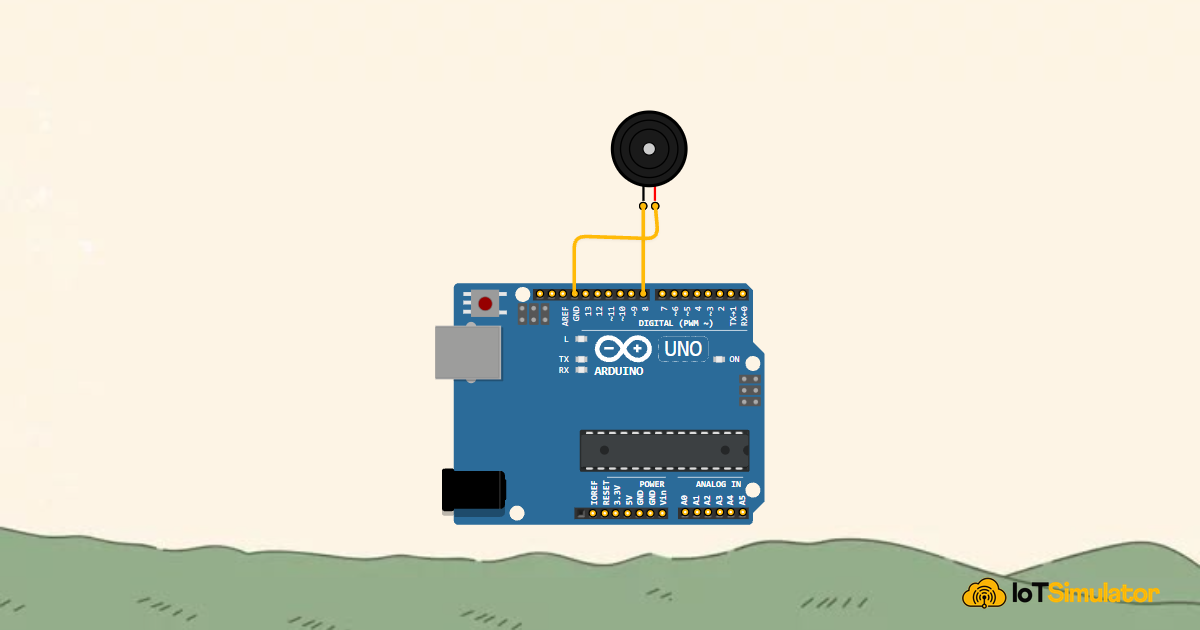
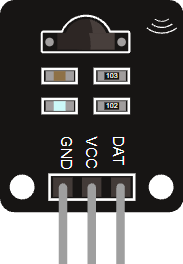
The Arduino setup is simple: one digital pin sends the tone signal, and the ground pin closes the circuit. In this example, the buzzer is connected to Arduino pin D8, which matches the pin used in the sketch below.

Pin Connection
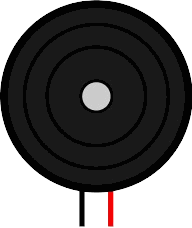
The pin connection is simple, but polarity still matters. Match the negative side to ground and send the positive side to the Arduino output pin so the buzzer can vibrate correctly.
This is the negative side of the buzzer and must return to ground.
This is the signal side that the Arduino drives with tone output.
If you move the buzzer to another digital pin, remember to update the pin number in the sketch. The wiring stays the same, but the code must match the new signal pin.
Polarity
Polarity matters because the buzzer has a positive and a negative side. If the module is wired backward, it may not behave as expected, so keeping the pins matched is the safest approach. On a beginner build, this is one of the first small mistakes that can make a circuit seem broken even when the code is fine.
Code
This example plays a short three-note chime instead of a single fixed beep. That gives you a better first look at how tone() can create different pitches and how a small pause between notes makes the sound easier to hear.
Once this basic sound works, you can replace the chime with a button alert, a timer beep, or a longer melody pattern. The structure stays the same, so this is a good foundation for more interactive sound feedback later.
How The Code Works, Part By Part
Let's break the sketch into smaller pieces so the flow is easier to understand and easier to modify later.
Setup
The setup block prepares the buzzer pin as an output. That tells the board it will be sending sound-related signal changes from this pin.
Play Note
Here the sketch chooses the next note from the melody and starts it at a fixed frequency. That creates the audible pitch you hear from the buzzer.
Pause Between Notes
After each note, the sketch stops the tone and leaves a tiny gap before the next note begins. That small pause keeps the melody from turning into one long buzzing sound.
Repeat Pattern
The loop repeats the pattern so the buzzer keeps playing the same short chime at a steady pace. That repeated sound is what makes it useful for alarms and reminders.
Wrapping Up
The Buzzer is a simple but valuable output part when you want the Arduino to make a sound instead of only showing a light. It is especially useful when the project needs a quick audible cue, like a beep for a button press, a timer warning, or a short startup chime.
Once you understand the tone function, the polarity, and the difference between a short beep and a repeating note pattern, you can use the buzzer confidently in alerts, reminders, and interactive projects. If the sound feels too sharp or too quiet, the next thing to check is usually the frequency choice, the pin wiring, or whether the buzzer type matches the code you are using.
That small amount of tuning is usually enough to make the buzzer feel polished in a real project. After that, you can reuse the same idea in countdowns, warning systems, or little sound effects that make the circuit feel more alive.