Making a Beep and Flash with a Button
In this easy project you'll wire a push button to an Arduino so every press lights up a blue LED and sounds a buzzer. You'll learn how buttons work, why pins can be 'noisy', and a few simple code tricks to make your gadget feel snappy.
Live project track
Have you ever wondered what happens inside a doorbell or a light switch? When you push a button, you are telling a machine to do something. This is the magic of interaction. In this project, we are going to build a simple machine that listens for your touch and reacts instantly with a bright blue light and a friendly beep.
We are going to learn how to bridge the gap between the physical world (your finger) and the digital world (the Arduino's brain). We will also solve a few 'mystery problems' that usually confuse beginners, like why buttons sometimes trigger all by themselves!
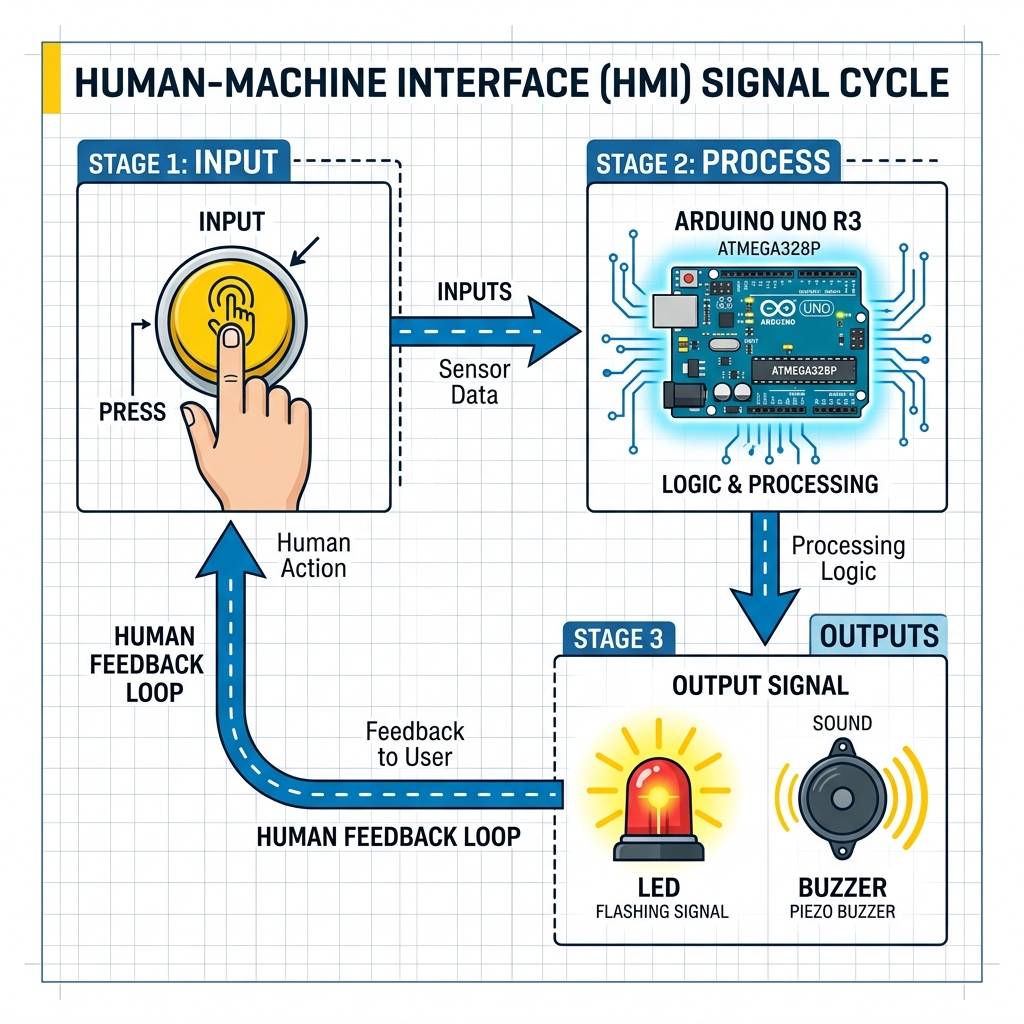
The Click, the Think, and the Beep
Every gadget you use follows a simple path. We call it the Loop of Action. It has three easy steps: Input, Process, and Output. In our circuit, the 'Input' is your finger pushing the button. The 'Process' is the Arduino thinking about what to do. The 'Output' is the blue light and the buzzer beep.
This happens so fast that it feels like magic. If you press the button, the light turns on faster than you can blink! This 'snap' factor is what makes a gadget feel good to use. If the light took a whole second to turn on, you would think the machine was broken.
Why Two Signals are Better Than One
You might ask: 'Why do we need a light AND a buzzer?' Think about using your phone in a very bright park—you might not see the screen clearly, so you listen for a 'click' sound. Or think about being at a loud concert—you might not hear the beep, so you look for a flashing light. By using both, we make sure the user knows their button press worked, no matter where they are!
Inside the Secret World of Buttons
A button looks like a simple piece of plastic, but inside it has a tiny secret. There is a small, curved piece of metal that acts like a spring. When you push the button down, you are forcing that metal spring to flatten out and touch two wires. This completes the path for the electricity to flow.

When you let go, the spring 'pops' back up and cuts off the electricity. But because it's a spring, it actually vibrates and 'bounces' for a tiny fraction of a second before it stops. We'll talk about why that matters when we look at our code!
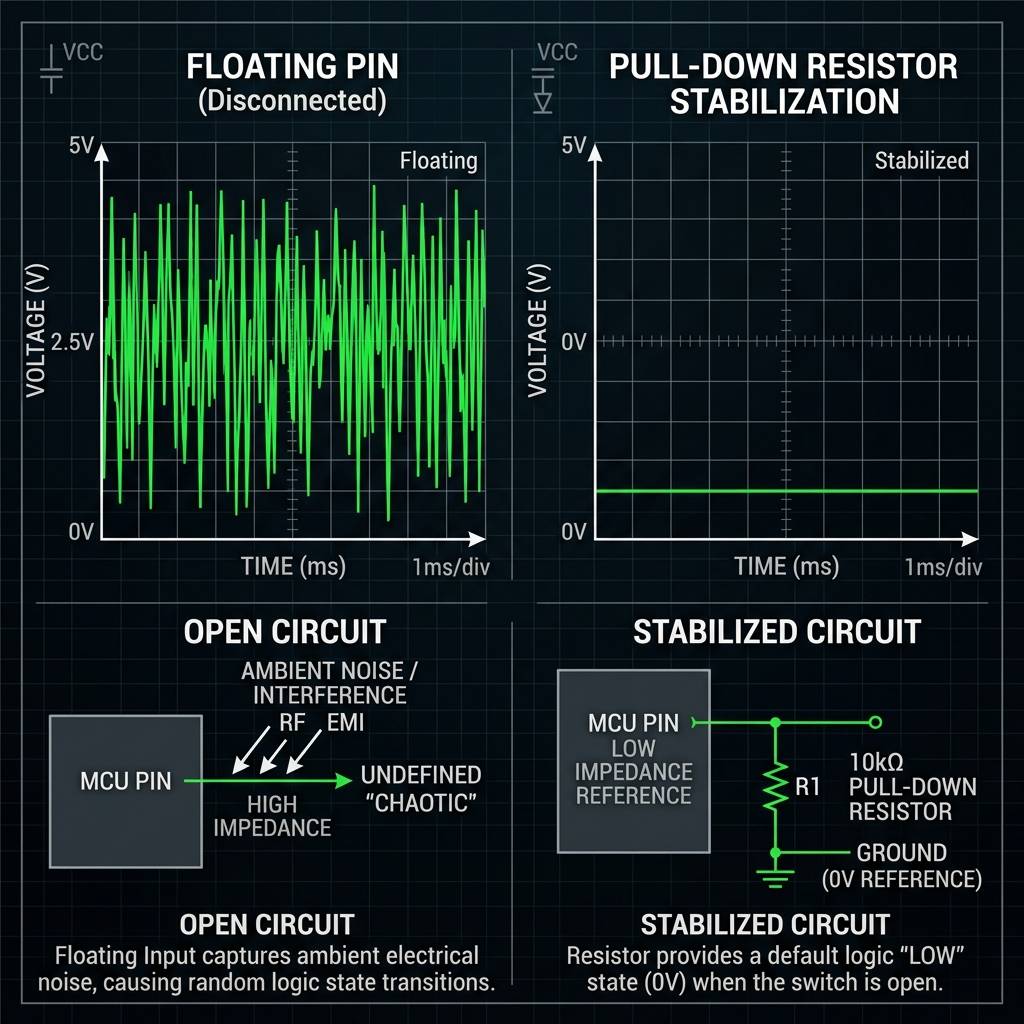
The Ghost in the Wire
One of the biggest mysteries for new makers is the Floating Pin. Imagine your Arduino pin is like a very sensitive ear. If you don't connect a button to it properly, it is just 'floating' in the air. It starts hearing 'Electrical Ghosts'—tiny bits of static electricity from the air or even from your own skin.
These ghosts can trick the Arduino into thinking you pressed the button, even if you are standing across the room! To fix this, we use a Resistor. Think of the resistor like a 'silencer'. it pulls the static electricity away to the Ground (GND), keeping the pin quiet until you actually press the button.
| What You Do | What the Pin Sees | What Happens |
|---|---|---|
| Button is Open | Steady Ground | Light stays OFF |
| Button is Pressed | Strong 5V Signal | Light and Beep turn ON |
| No Resistor | Electrical Static | Random Flashing (Ghosts!) |
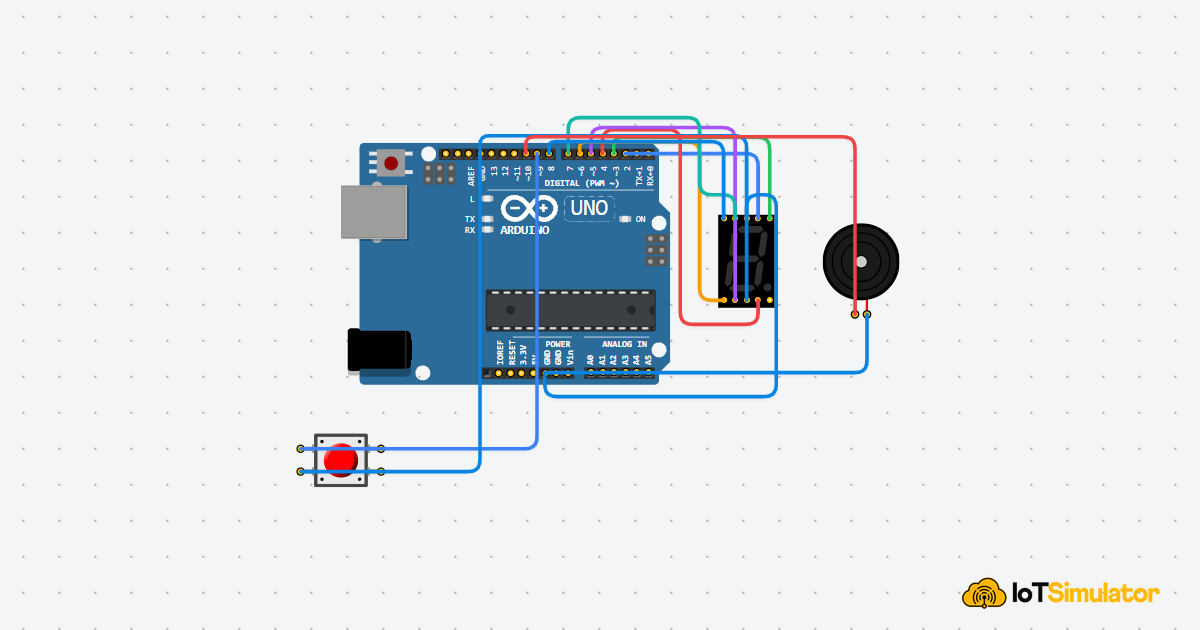
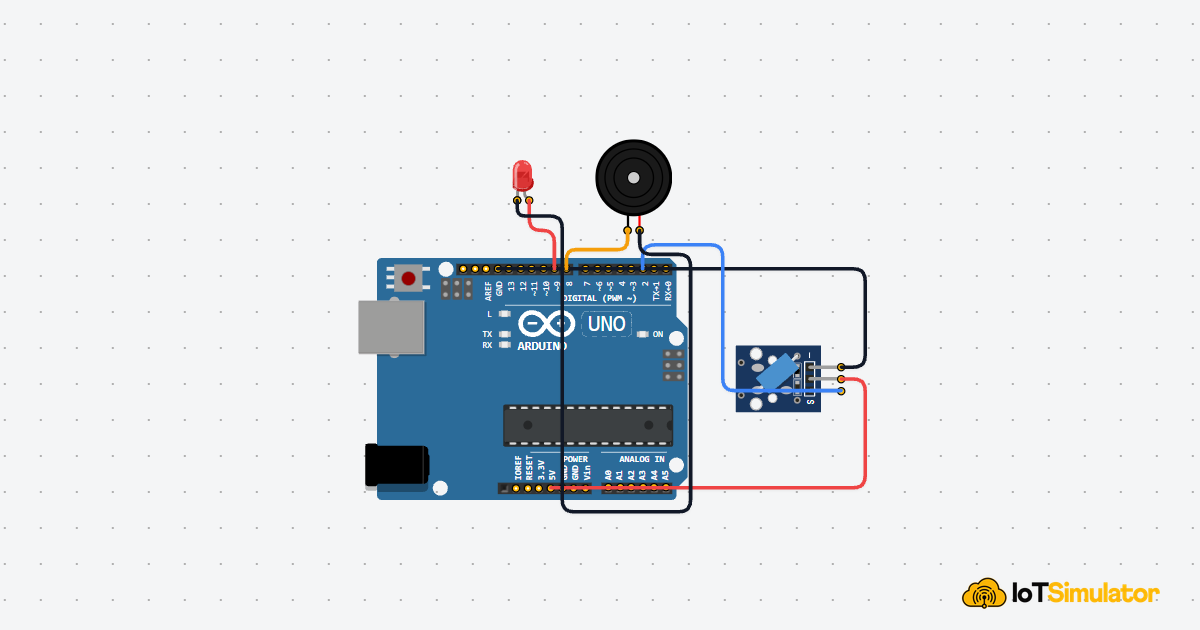
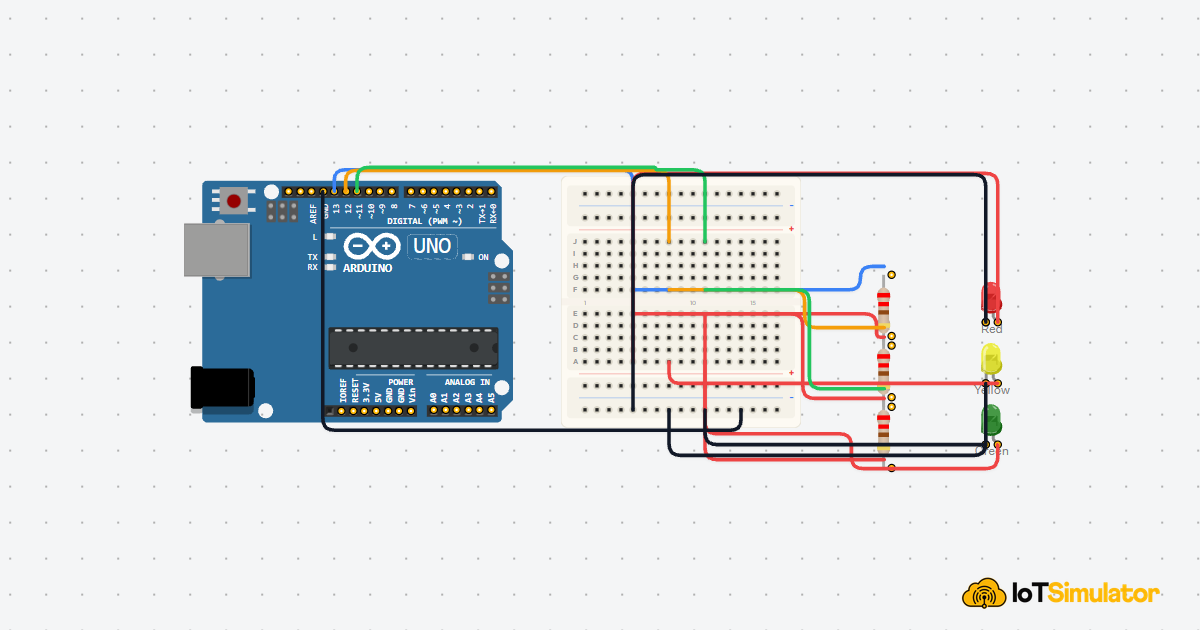
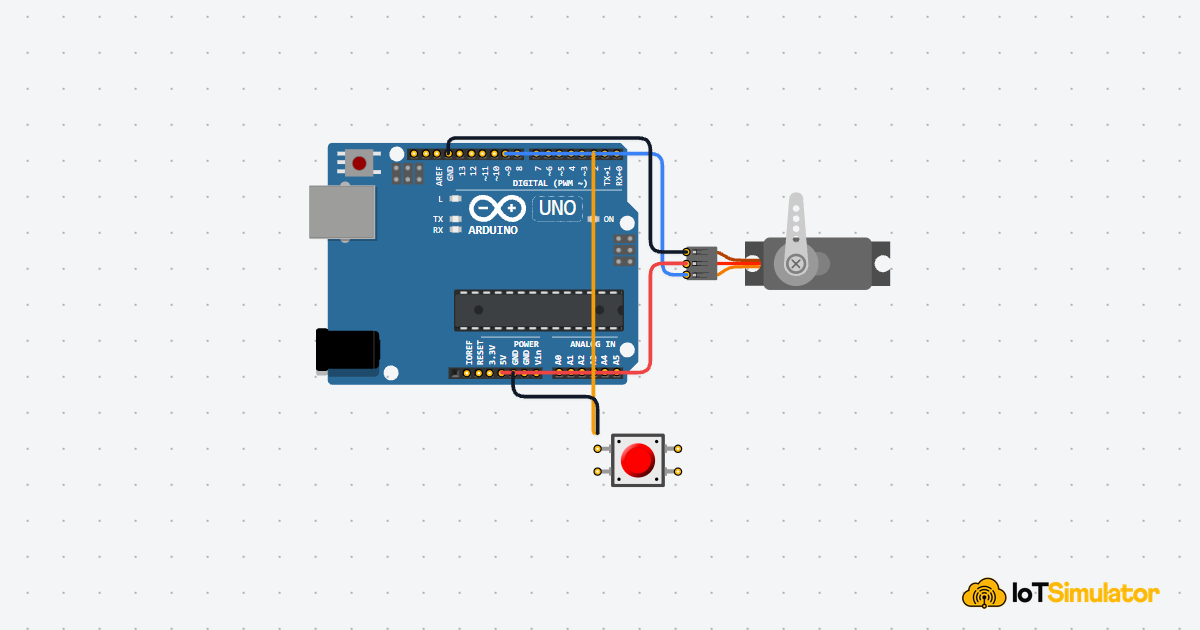
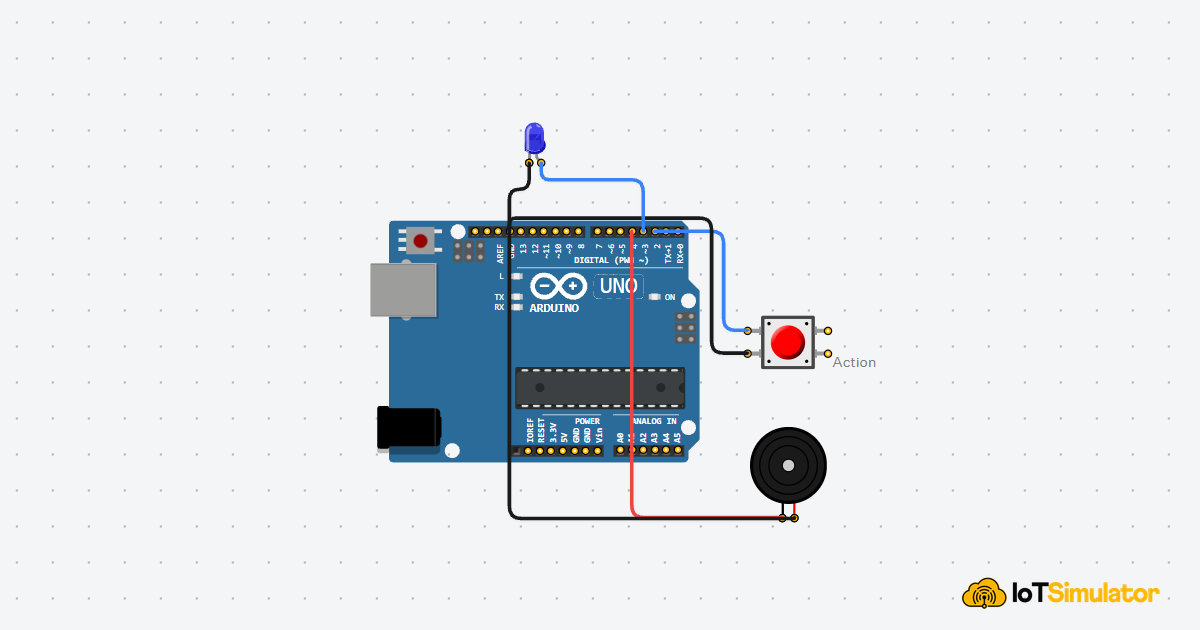
Wiring the Response
To keep our wiring neat, we use a shared 'Ground' line. Even though the light and the buzzer are doing different jobs, they both need to send their leftover electricity back to the same GND hole on the Arduino. It's like having multiple sinks in a house that all lead to the same drain pipe.
| Component | Pin Number | What it Does |
|---|---|---|
| Push Button | Pin 2 | Listens for your touch |
| Blue LED | Pin 3 | Shows a blue flash |
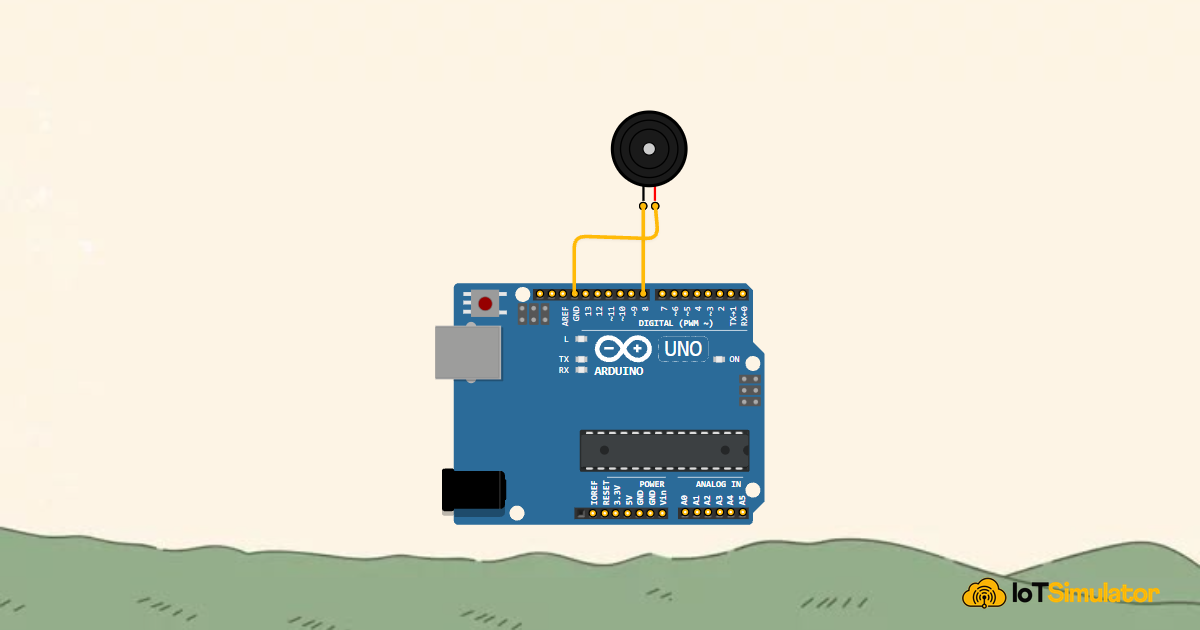
| Piezo Buzzer | Pin 4 | Makes a beep sound |
Remember: We are using a Blue LED. Blue LEDs are very powerful and need a lot of energy to glow. In a real-life circuit, you would always use a small resistor with it so it doesn't get too hot and burn out. In our simulator, we've made it safe for you to experiment!
The Responsive Brain
The code we write is the 'Brain' of our machine. It spends its whole life asking one simple question over and over again: 'Is the button being pressed right now?'
How the Brain Works
The digitalRead() Command
This command is like the Arduino's sense of touch. It checks Pin 2 and says 'I feel 5 Volts!' (which means 1) or 'I feel nothing!' (which means 0). Because we used our silencer resistor, the Arduino only feels 5 Volts when you are actually pushing the button down.
Making a Choice
The if-else part of the code is where the Arduino makes a choice. It's like a fork in the road. 'If the button is pressed, go this way and turn on the lights. Otherwise, go the other way and keep them off.' This happens thousands of times every single second, so the Arduino never misses a click.
The Jitter Problem
Sometimes, if you were building a very fast game, you might notice that one button press counts as two or three. Remember that little metal spring inside the button? When it hits the wire, it jitters and bounces like a ball on the floor. To the super-fast Arduino, it looks like you pressed the button multiple times!

In this project, we don't worry about it because a tiny jitter doesn't change how the light looks. But in future projects, we will learn how to 'De-bounce' the signal to make it perfectly smooth.
More Fun Ideas to Try
Now that you have your first interactive machine working, here are some cool ways to change it:
- The Toggle Challenge: Can you change the code so the light turns ON with one click and STAYS on until you click it again? (Hint: You'll need a variable to remember the state!)
- Secret SOS: Make the LED blink the 'SOS' signal (three short, three long) whenever you hold the button down.
- High-Pitch Beep: Use the
tone()command to make the buzzer beep at a super high pitch like a mosquito! - The Invisible Resistor: Change your code to
pinMode(buttonPin, INPUT_PULLUP). This turns on a secret 'silencer' resistor inside the Arduino itself, so you can remove the extra one from your breadboard!
You've just built your first interactive device. Every big machine, from a spaceship to a microwave, uses these same basic rules. Happy making!