This article is a guide about the DHT22 sensor. We will explain what it measures, how its single data line works, how to wire it, and how to read temperature and humidity in an Arduino sketch.
The DHT22 is a very common sensor for beginner weather stations, room monitors, and other projects that need both temperature and humidity data from a single part.
You may also see this sensor sold as AM2302. That name shows up often in datasheets and product listings, so it helps to know both names mean the same family of sensor.
Description
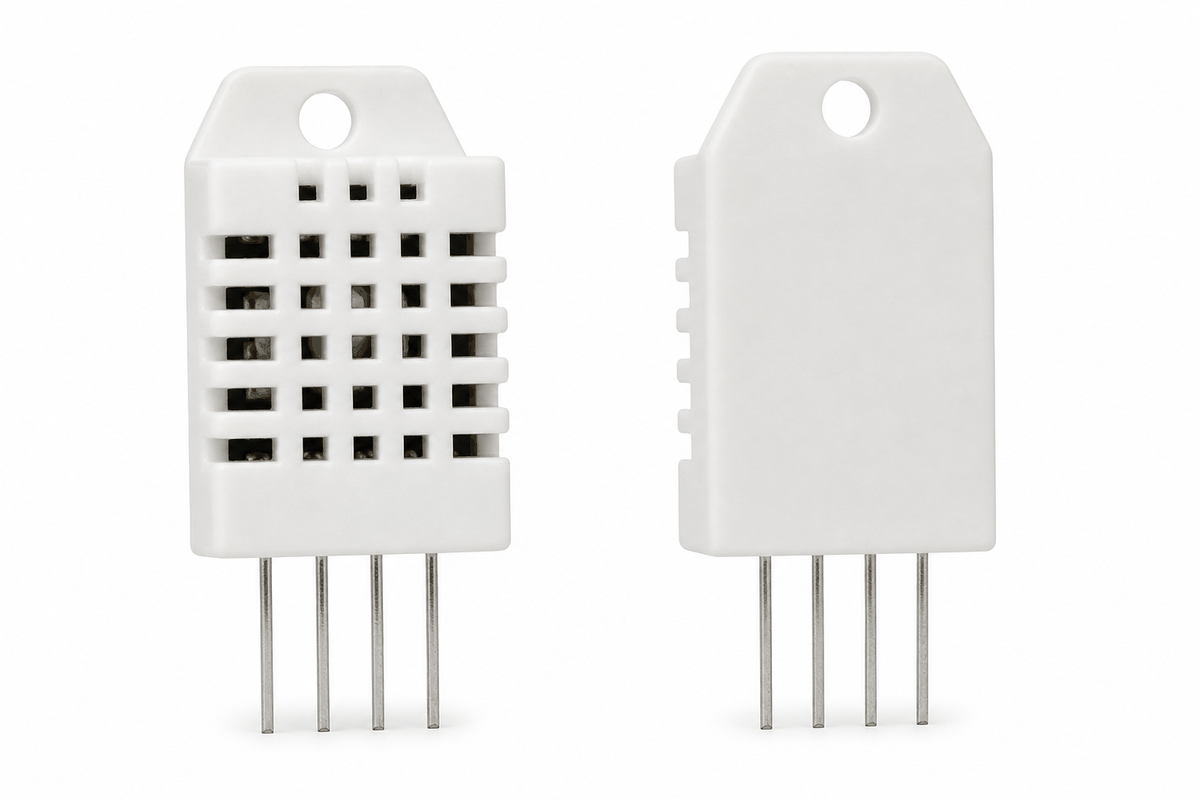
The DHT22 is a digital sensor that measures temperature and humidity. Inside the module is a humidity sensing element, a temperature sensing element, and a small chip that packages the measurement into a digital signal the Arduino can read.
That makes it different from a simple analog sensor. Instead of sending a changing voltage directly, the DHT22 sends a structured digital reading. The Arduino library handles that protocol and turns the sensor data into numbers you can use in your sketch.
In practice, this is a sensor for environmental trends rather than rapid changes. It is a strong fit for room monitoring and weather projects because it gives two useful values from one part, but it is not meant for fast sampling like a button or motion sensor.
The DHT22 is also sold as AM2302, and the two names are often used for the same sensor family. The simulator and the real-world part line up well here: one data pin, one slower reading cycle, and a library-based workflow that keeps the code manageable.
Features
Here are the main things to know about the DHT22:
| Feature | What it means |
|---|---|
| Temperature reading | Measures ambient temperature, usually in a wide home and hobby range. |
| Humidity reading | Measures relative humidity as a percentage. |
| Power range | Works from 3.3V to 5V, which makes it easy to use with common Arduino boards. |
| Digital output | Uses a timed digital protocol instead of an analog voltage. |
| Single data line | Only one signal line is needed in addition to power and ground. |
| Slow sampling | Best read about once every 2 seconds so the values stay reliable. |
| Library support | Works with the DHT sensor library and related DHT libraries. |
| Beginner friendly | Easy to wire and common in Arduino examples. |
The slow but simple reading style is one reason the DHT22 is so popular for weather and environment projects. It is not flashy, but it is reliable enough for a lot of beginner builds.
How Does It Work?
The DHT22 measures temperature and humidity, then sends that information to the Arduino as a timed digital signal. The sketch does not guess the values itself. Instead, the library talks to the sensor using the sensor's communication format and converts the response into readable numbers.
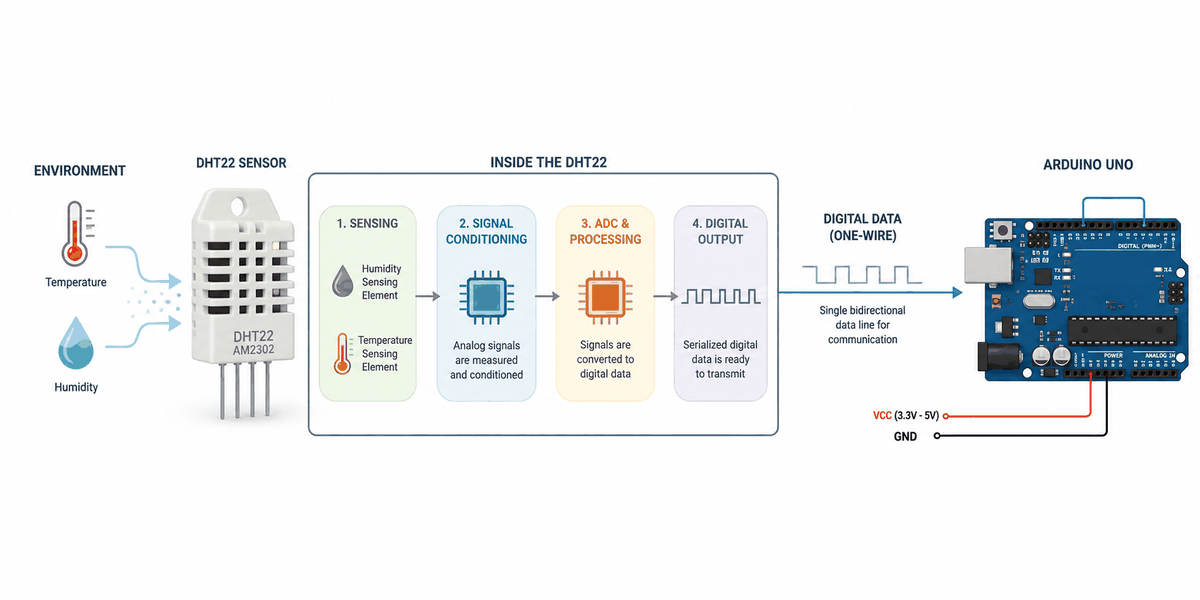
That process is very useful for beginners because the code stays simple even though the sensor is doing real measurement work behind the scenes. A good way to think about it is this: the sensor does the measuring, and the library does the talking.
The sensor is not fast like a button or an LED. It needs a short delay between reads, and that is normal. In many projects, reading it every two seconds is a good habit because it gives the sensor time to update correctly. If you read it too fast, you are more likely to get stale or unreliable values.
Digital Protocol
The data line is not an analog voltage read like a potentiometer. Instead, the Arduino asks for a value and the sensor answers using a timed digital exchange. That is why most DHT22 sketches start by loading a library instead of calling only analogRead().
The communication is simple for the user, but it is still more structured than a plain analog sensor. The library is doing the timing work so you do not have to hand-code the pulse sequence yourself.
Slow Sampling
Because the sensor updates slowly, reading it too often can give stale results. A small delay between readings helps the module behave more reliably and makes the serial output easier to follow.
In real projects, the DHT22 is best treated as a steady environment sensor rather than a high-speed input. That makes it a better fit for room conditions, weather logging, and fan control than for fast-changing events.
Pinout
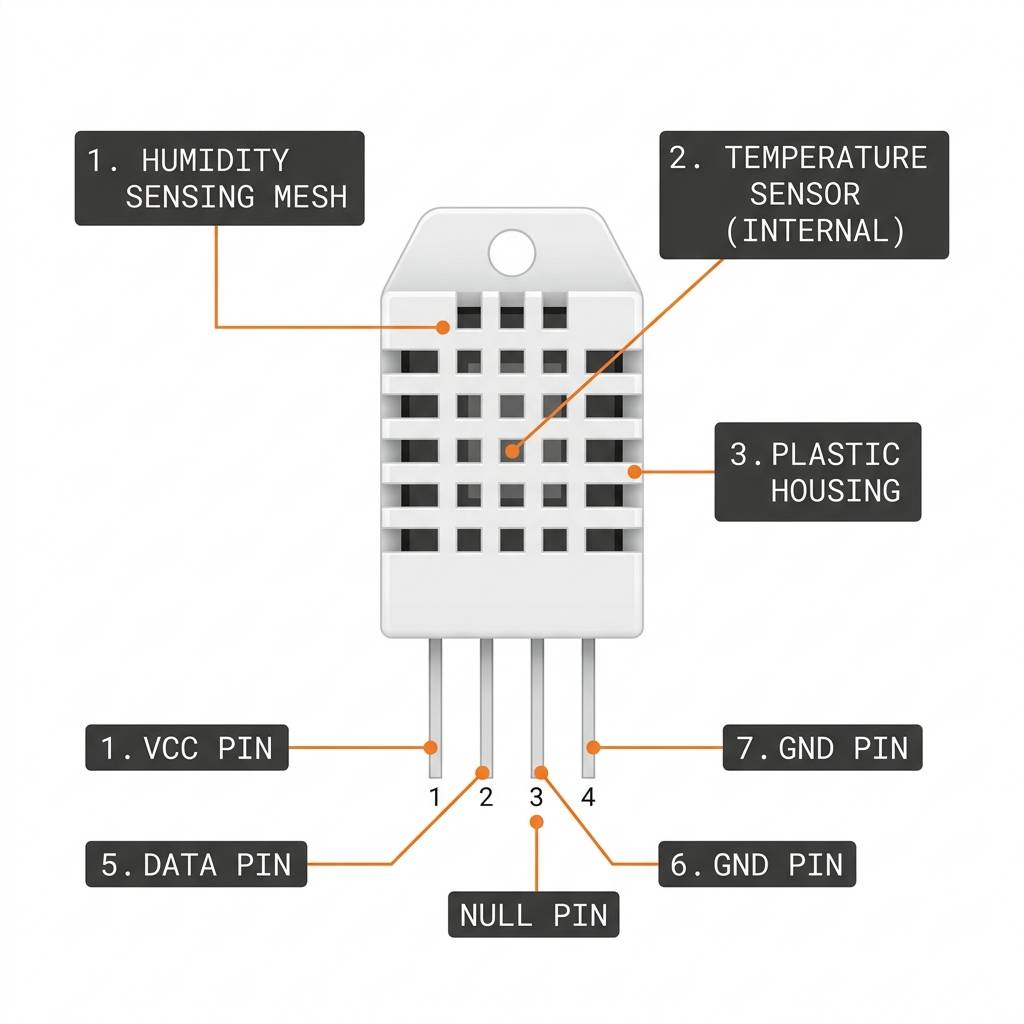
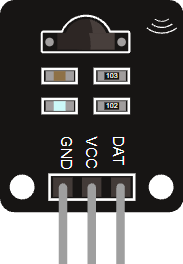
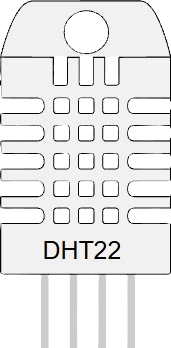
The pin layout is simple once you know what each side does. In the simulator, the DHT22 shows four pins: VCC, SDA, NC, and GND. The SDA pin is the digital data line, and NC is not connected.
Pin Role
VCC powers the module, SDA carries the digital signal, and GND completes the circuit. NC is left unused.
In many breakout boards, the pull-up resistor is already included on the module. If you are using a bare sensor or a board without that resistor, the data line usually needs one so the communication stays stable. When that pull-up is missing, the reading often looks random or the sketch never gets a clean response.
Arduino With DHT22
The Arduino setup is simple: one digital pin handles the data line, and the power pins keep the sensor stable. In this example, the DHT22 is connected to Arduino pin D2, which matches the pin used in the sketch below.
A common use case for this setup is a small room monitor or weather station. The Arduino can read the temperature and humidity, show the values on Serial Monitor, and later turn on a fan, trigger an alert, or update a display when the room gets too warm or too humid.

Pin Connection
The pin connection is simple, but each line has a specific role. Power, ground, and the single data line must all be in the right place so the library can talk to the sensor correctly.
Powers the sensor so the temperature and humidity circuit can work.
Carries the digital data signal from the DHT22 to the Arduino.
This pin is not used and should be left open.
Gives the sensor and the Arduino the same electrical reference.
If your module includes an onboard pull-up resistor, the connection stays this simple. If not, check the module documentation or add the needed pull-up so the data line stays stable. The wiring looks small, but the data pin still needs a clean connection for the readings to stay reliable.
Code
This example reads both humidity and temperature, checks for failed reads, and then prints the values to Serial Monitor so you can see the sensor working in real time. It is a practical first sketch because it shows the full value pair instead of only one number and also tells you when the sensor does not answer correctly.
Once the sensor prints stable values, you can use the readings to control a fan, log weather data, or update a display in your own project. If the values jump around or the error message appears, that usually tells you the timing or wiring needs another look rather than the sensor itself being broken.
How The Code Works, Part By Part
Let's break the sketch into smaller pieces so the flow is easier to understand and easier to modify later.
Library And Pin Setup
The sketch starts by loading the DHT library and defining which pin carries the sensor data. This tells the Arduino how to talk to the module.
Setup
Inside setup(), Serial Monitor starts first, then the sensor library is initialized. That prepares both the debug output and the DHT communication.
Read Values
The loop asks the sensor for humidity and temperature. These values come back as floating-point numbers, which makes them easy to print or compare later in the sketch. At this stage, the code is simply asking for the latest environment reading and storing it in a pair of variables.
Error Check
The sketch checks whether either reading failed. That small guard makes the output easier to trust because the program can tell the difference between a real environment value and a communication problem.
Print Values
The sketch prints the two values so you can confirm that the reading is working and the numbers change as the environment changes.
Repeat
The delay gives the sensor enough time before the next read. This is important because the DHT22 is designed for slower, stable measurements rather than rapid polling. In real use, this pause is often the difference between a clean reading and a messy one.
Wrapping Up
The DHT22 is a great sensor when you want Arduino to read temperature and humidity from the environment.
Once you understand the digital communication, the slower sampling rate, the pinout, and the library-based workflow, you can use the DHT22 confidently in weather dashboards, room monitors, and other practical projects.