This article is a guide about the HX711. We will explain how it works, show how to wire it to an Arduino, and walk through a simple scale example you can use in your own projects.
The HX711 is useful when a project needs to measure weight, pressure, or strain with a load cell.
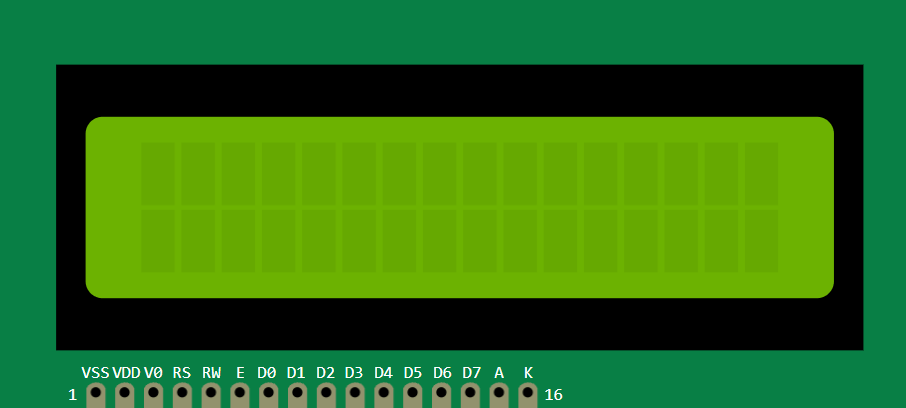
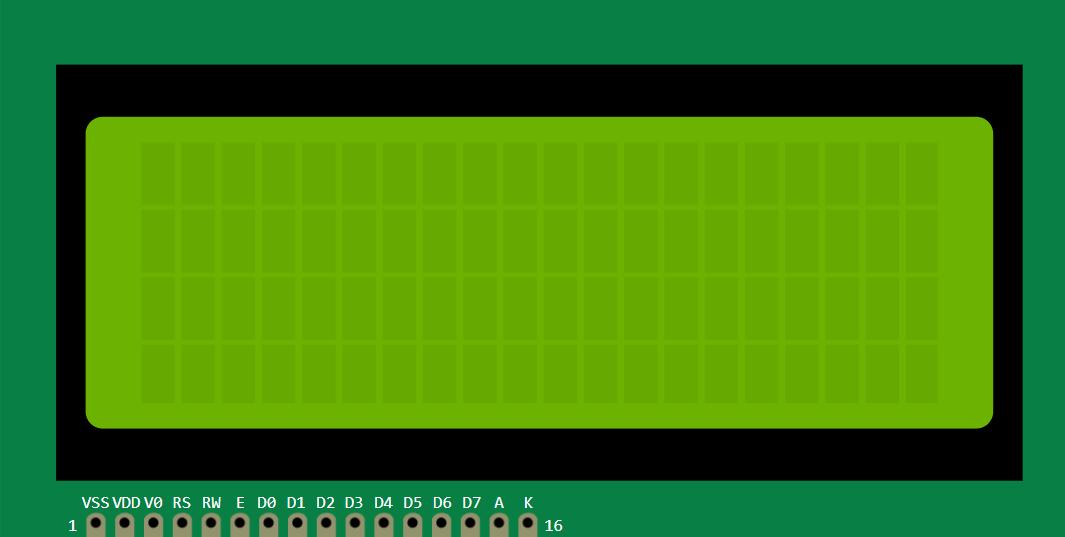
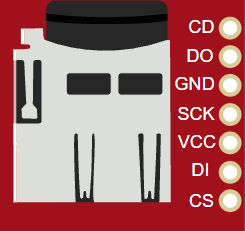
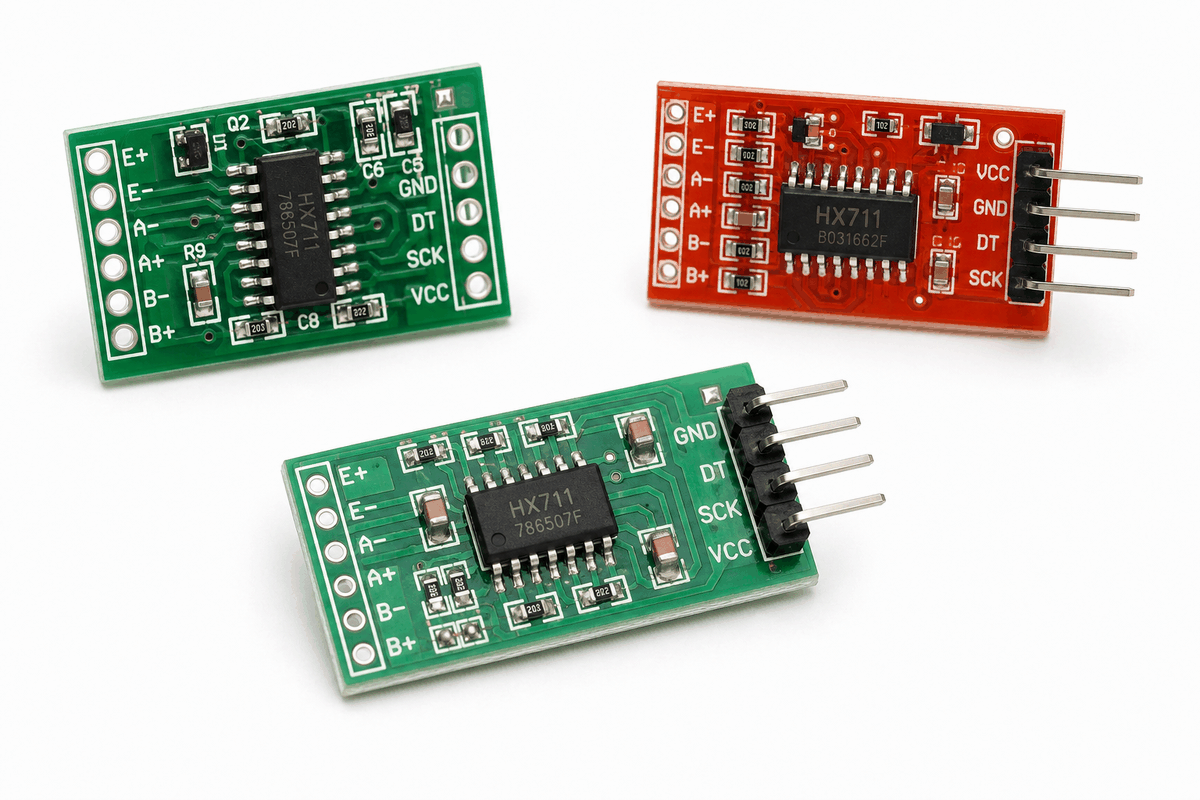
Before we get into the wiring, it helps to look at the real module first so the amplifier chip and the load-cell input pins are easier to recognize.
Description
The HX711 is a load-cell amplifier and ADC, not a load cell by itself. It reads the tiny resistance changes from a Wheatstone bridge load cell and turns them into a digital value the Arduino can understand.
The HX711 provides the bridge excitation, amplifies the tiny differential signal, and converts it into a stable reading. That is why it is usually sold and used together with a load cell in scale projects.
In practice, people choose the HX711 when they want a reliable bridge between the mechanical world and the digital world. It becomes useful in IoT builds where weight needs to trigger another action, such as a smart scale, a feeder, or a storage bin monitor.
That makes it a very practical module for digital scales, kitchen weigh stations, strain measurement, and project demos where you want a stable reading instead of a raw analog signal.
Relation HX711 with Load Cell
People buy the HX711 because it solves the main problem in load-cell projects: the sensor signal is extremely small and noisy if you try to read it directly.
The HX711 is built specifically for load cells, which are bridge-style strain sensors. It powers the bridge, amplifies the tiny differential output, and turns it into a clean digital reading that Arduino can work with reliably.
- The load cell changes resistance only by a very small amount when weight is applied.
- The HX711 turns that weak bridge output into a usable digital value.
- Together, they make scale projects stable enough for logging, display, or control.
That pairing is why the HX711 shows up in digital scales, hopper monitors, force tests, and other IoT builds where weight needs to trigger another action. Once the reading is stable, it can drive a buzzer, relay, display, or Wi-Fi module without extra analog circuitry.
Without the HX711, the load cell signal is usually too small to trust. With it, the reading becomes practical enough to build around.
Features
Here are the main things to know about the HX711:
| Feature | What it means |
|---|---|
| 24-bit ADC | Reads very small load-cell changes with high resolution. |
| Digital interface | Uses DT and SCK instead of analog input pins. |
| Tare support | You can zero the scale before measuring a load. |
| Calibration friendly | Works with a scale factor to convert raw readings into units. |
| Weight project fit | Common in digital scale and force-measurement builds. |
The useful part is that the module hides the tiny analog changes and gives the Arduino a cleaner digital reading to work with.
How Does It Work?
A load cell changes resistance when weight is applied. The HX711 reads that bridge signal, amplifies it, and converts it into a digital number. The Arduino then talks to the chip over DT and SCK to get the reading.
Once the sketch knows the raw value, it can subtract the tare offset and apply a calibration factor. That is what turns a raw ADC number into grams, kilograms, or another usable weight unit.
In Wokwi, the HX711 can be controlled by load simulation, which makes it easy to test how the reading changes when the weight increases or decreases.
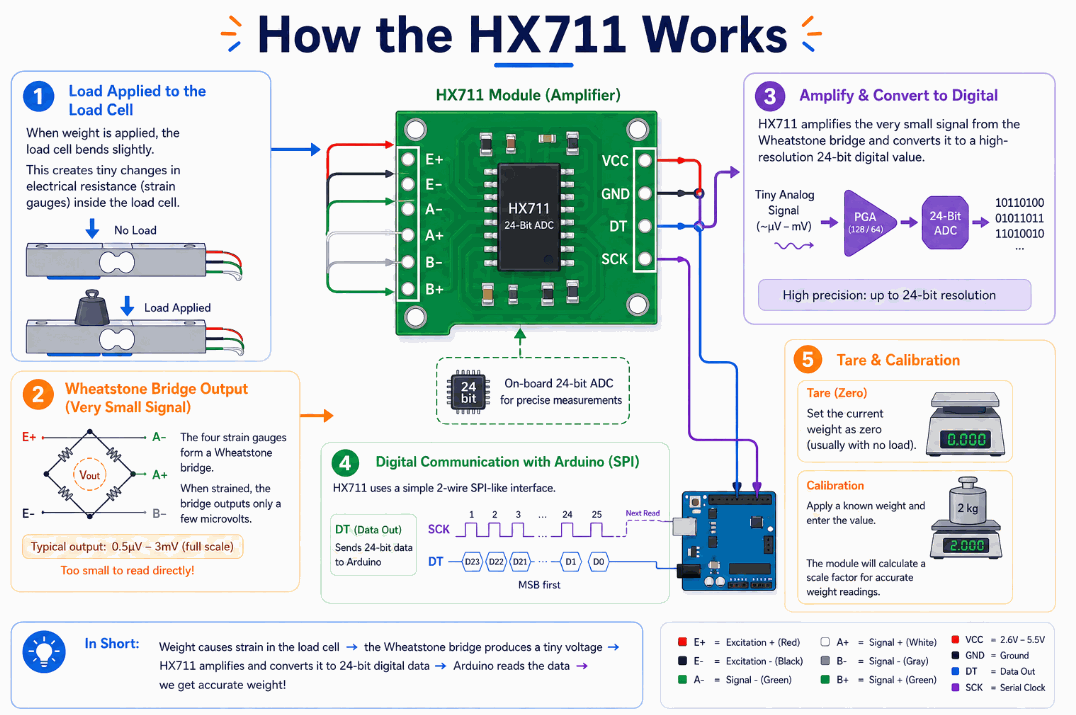
Strain Change
When weight is placed on the load cell, the metal element bends a tiny amount.
That bend changes the resistance of the strain gauges inside the bridge.
Bridge Signal
The strain gauges form a Wheatstone bridge, but the signal coming out of that bridge is extremely small.
That tiny signal is why the module needs an amplifier before the Arduino can read it reliably.
Amplify And Convert
The HX711 boosts the bridge signal and converts it into a 24-bit digital value.
That is the part that makes the module useful for scales, because the Arduino can read the result without needing to deal with microvolt-level signals directly.
Digital Link
The Arduino talks to the HX711 with DT and SCK.
DT sends the data back, while SCK provides the clock pulses that step the reading out of the chip.
Tare And Calibration
After the raw reading arrives, the sketch can tare the scale and apply a calibration factor.
That is what turns a raw number into grams, kilograms, or any other unit you want to display.
Arduino With HX711
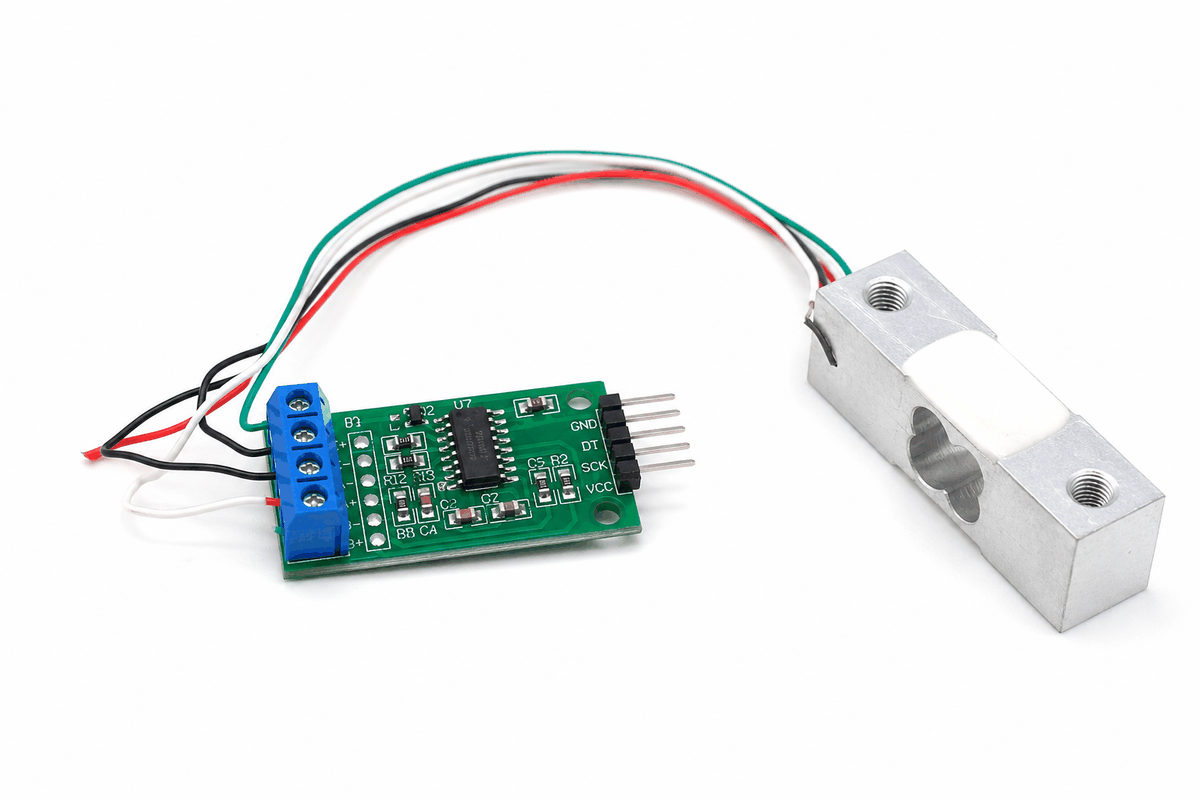
The Arduino setup is straightforward once you separate the load cell side from the communication side. The load cell connects to the amplifier board, while the Arduino only needs the power pins and the two data pins that drive the HX711 protocol.
That makes the circuit easy to understand even though the measurement itself is very sensitive. In practice, the analog work happens inside the amplifier, so the sketch can focus on reading, taring, and calibrating the final value.

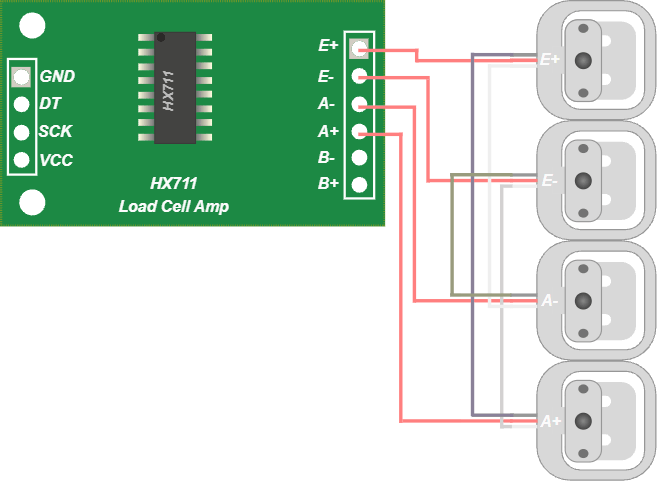
Pin Connection
The pin map is short, but each connection matters. The HX711 side talks to the Arduino through two digital pins, and the load-cell side carries the tiny bridge signal into the amplifier.
Powers the HX711 module.
Shares the same ground reference with the Arduino.
Sends the digital data back to the Arduino.
Provides the clock pulses used to read each sample.
Feeds the bridge with excitation voltage.
Carries the small measurement signal from the load cell.
Code
This example follows the same topology as the circuit preview: the load cell feeds the HX711, and the HX711 communicates with the Arduino through DT and SCK.
The sketch initializes the module, tares the scale, sets the calibration factor, and prints weight readings to Serial Monitor.
The sketch prints a live weight estimate after averaging a few samples.
In a real project, you would tune the calibration factor for your specific load cell so the numbers match the scale you want to measure.
How The Code Works, Part By Part
Let's break the sketch into smaller pieces so the flow is easier to understand and easier to modify later.
Setup
The setup block starts Serial Monitor, creates the HX711 object, and prepares the module for measurement.
This is where the board and the amplifier are connected for the first time in code.
Zero The Scale
Taring tells the HX711 that the current weight should be treated as zero.
This step is important because it removes the weight of the container or platform before you measure anything else.
Calibrate And Read
After taring, the code applies a calibration factor and reads the weight value.
The calibration factor is what turns the raw number into a meaningful unit such as grams.
Output And Repeat
Finally, the sketch prints the value and waits before sampling again.
That keeps the Serial Monitor readable while still updating often enough for a live scale display.
Wrapping Up
The HX711 is the standard way to connect a load cell to an Arduino when you want real weight readings instead of a raw electrical signal.
Once the wiring and calibration are set, the module is very straightforward to use.
That makes it a strong choice for digital scales, force measurement, and other projects that need precise low-level readings.
It is especially helpful in beginner projects because it shows a very practical measurement chain: the load cell senses strain, the HX711 cleans up that tiny signal, and the Arduino turns it into something a person can read. Once you understand that chain, it becomes much easier to build a stable scale, check calibration, and trust the number on the screen.