This article is a guide about the Arduino Uno. We will explain what the board does, how it works, where the main pins are, and how to run a simple example sketch.
The Arduino Uno is one of the most common starter boards because it is easy to wire, easy to program, and well supported by tutorials and libraries.
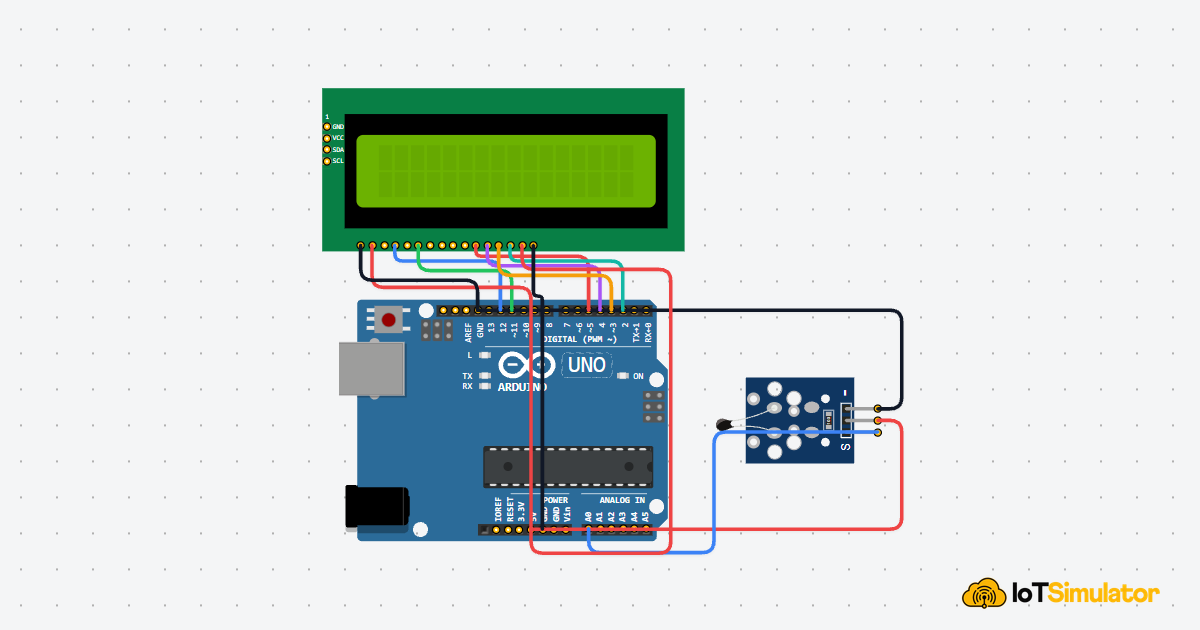
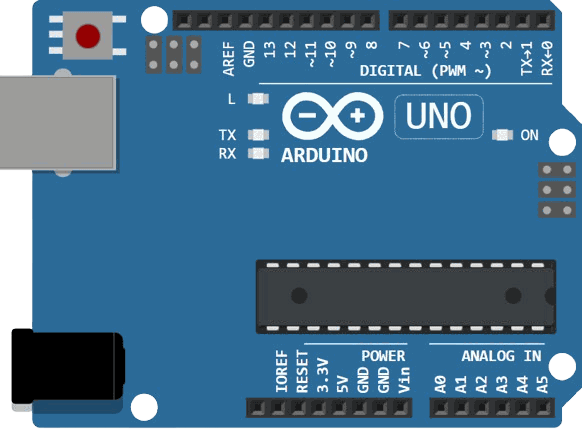
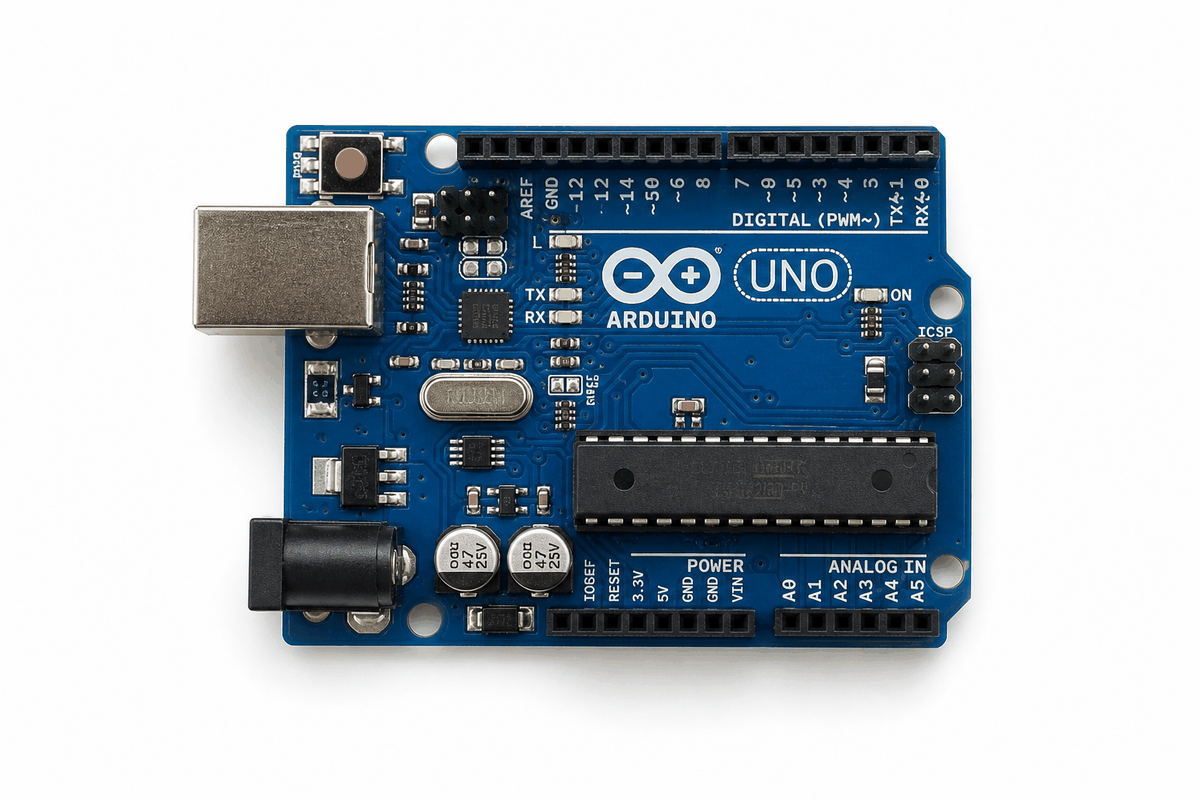
Before jumping into the details, it helps to look at the board itself so the layout, connector placement, and overall size are easier to understand.
Description
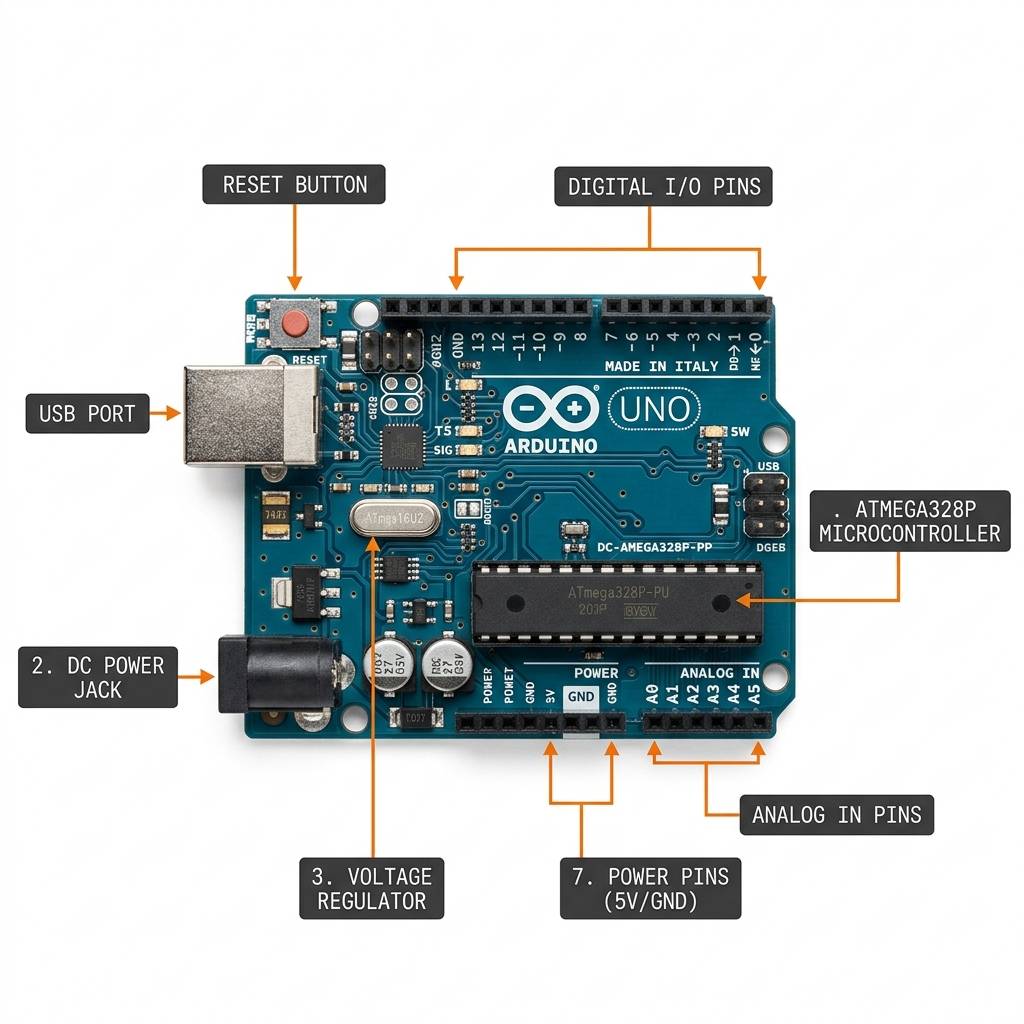
The Arduino Uno is a microcontroller board based on the ATmega328P. It gives you a simple way to connect sensors, switches, displays, motors, and other parts to a small computer that runs your sketch.
According to Arduino's official documentation, the Uno has 14 digital input/output pins, 6 analog inputs, and 6 PWM outputs. It also uses a 16 MHz ceramic resonator and includes a USB connection, power jack, ICSP header, and reset button.
The Uno is a classic choice for learning because it combines a friendly layout with enough pins for real projects. It is also large enough to be comfortable on a desk or breadboard, but still small enough to stay approachable for beginners.
Features
Here are the main things to know about the Arduino Uno:
| Feature | What it means |
|---|---|
| ATmega328P microcontroller | The chip that runs your sketch. |
| 14 digital I/O pins | Enough room for inputs and outputs in beginner and prototype builds. |
| 6 analog inputs | Useful for sensors that return a changing voltage. |
| 6 PWM outputs | Good for dimming LEDs and other simple analog-style control. |
| 16 MHz clock | Fast enough for many everyday Arduino projects. |
| USB-B connection | Used to upload code and open Serial Monitor. |
| Power jack | Lets the board run from an adapter or battery setup. |
| ICSP header | Provides direct programming and interface access. |
| Reset button | Restarts the sketch quickly when you need a fresh start. |
| 32 KB flash, 2 KB SRAM, 1 KB EEPROM | Enough memory for a huge number of small to medium projects. |
Those features make the Uno a good fit for first projects, class exercises, and small real-world prototypes that need a stable AVR board.
Arduino Uno vs Other Microcontrollers
The Uno is often the first board people learn, but it is not the only option. Beginners also compare it with Wi-Fi boards from the ESP family, compact microcontroller boards like Raspberry Pi Pico, and even full Raspberry Pi computers. Looking at those groups side by side makes it easier to choose the right board for the job instead of just choosing the one you already know by name.
Uno vs ESP Family
ESP boards such as the ESP32-C3 DevKitM-1 are built for connected projects. They usually include Wi-Fi and Bluetooth, run at higher clock speeds, and are a better fit for IoT dashboards, web servers, and networked sensors. The Uno is simpler, uses 5V logic, and is easier for pure hardware learning.
| Topic | Arduino Uno | ESP Family | Main Takeaway |
|---|---|---|---|
| Connectivity | USB only for upload and serial | Usually built-in Wi-Fi and often Bluetooth | ESP boards are better for connected projects. |
| Logic level | 5V logic | Commonly 3.3V logic | Uno is friendlier with older 5V modules. |
| Performance | 16 MHz AVR | Usually much faster and more memory-rich | ESP boards handle heavier firmware and networking. |
| Best fit | Learning electronics and simple prototypes | IoT, web-connected sensors, smart devices | Choose based on the project style. |
Uno vs Raspberry Pi Family
If you mean Raspberry Pi Pico boards, they are microcontroller boards like the Uno, but they use a different chip family and are often programmed with C, C++, or MicroPython. If you mean full Raspberry Pi computers, they are single-board computers that run Linux instead of a single sketch.
| Board Type | Arduino Uno | Raspberry Pi Pico Family | Full Raspberry Pi Computers |
|---|---|---|---|
| Operating system | No OS, runs one sketch | No OS, runs firmware | Linux-based computer |
| Typical role | Simple control and learning | Low-cost microcontroller projects | Desktop-like apps, UI, networking, media |
| Timing style | Very predictable for basic hardware work | Also real-time oriented | Less deterministic because it runs an OS |
| Connection style | External shields and modules | Flexible GPIO and modern MCU features | Full peripherals plus operating-system tools |
Pinout
The pinout is the best place to understand where each connection lives. The Uno keeps the layout practical: power pins are grouped together, digital pins are on one side, and analog inputs are easy to find. Once you learn the groups, wiring sensors and modules becomes much faster.
Digital Pins
The 14 digital pins are the main way the Uno talks to the outside world. You can use them as inputs for buttons and switches, or as outputs for LEDs, buzzers, relays, and many simple modules. In other words, these are the pins you will reach for first in most beginner projects.
A few digital pins have extra jobs too. Pins 3, 5, 6, 9, 10, and 11 support PWM, which lets the board simulate analog-style control like LED dimming or motor speed control. Pins 0 and 1 are the hardware serial lines, so they are usually left free when you want clean USB debugging.
Special Pins And Communication Buses
Some pins do more than simple input and output. A4 and A5 are commonly used for I2C devices like OLED screens and RTC modules, which is helpful because one pair of wires can talk to many modules. Pins 10, 11, 12, and 13 are tied to SPI, which you will see on SD cards and faster peripheral modules.
The AREF pin is also worth knowing about because it lets you set a custom analog reference voltage when a project needs more precise readings. For most beginners, though, it is easiest to leave AREF alone until a project specifically asks for it.
Analog Pins
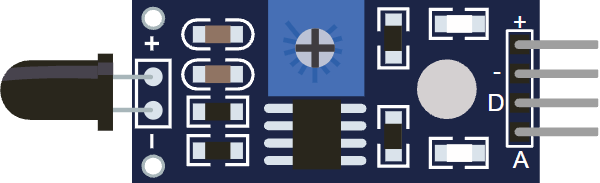
The 6 analog pins read a changing voltage and turn it into a number. That is why they are often used for potentiometers, light sensors, gas sensors, and other parts that do not behave like simple on/off switches. These pins are the easiest way to teach a Uno how to measure the world instead of only reacting to on and off signals.
When a project needs a value between 0 and 1023, the analog inputs are the place to start. That makes them a great fit for knobs, joysticks, temperature modules, and other sensors that vary gradually.
Power Pins
The power header gives you 5V, 3.3V, GND, and VIN so you can power small modules safely and keep the wiring neat. GND is especially important because every module needs a shared reference point before the signal wiring can make sense.
VIN is useful when you want to feed the board from an external supply, while 5V and 3.3V are the rails you will usually use for sensors and breakout boards. In a simple build, these pins are what turn the Uno from a chip on a board into a complete working circuit.
Powering The Uno
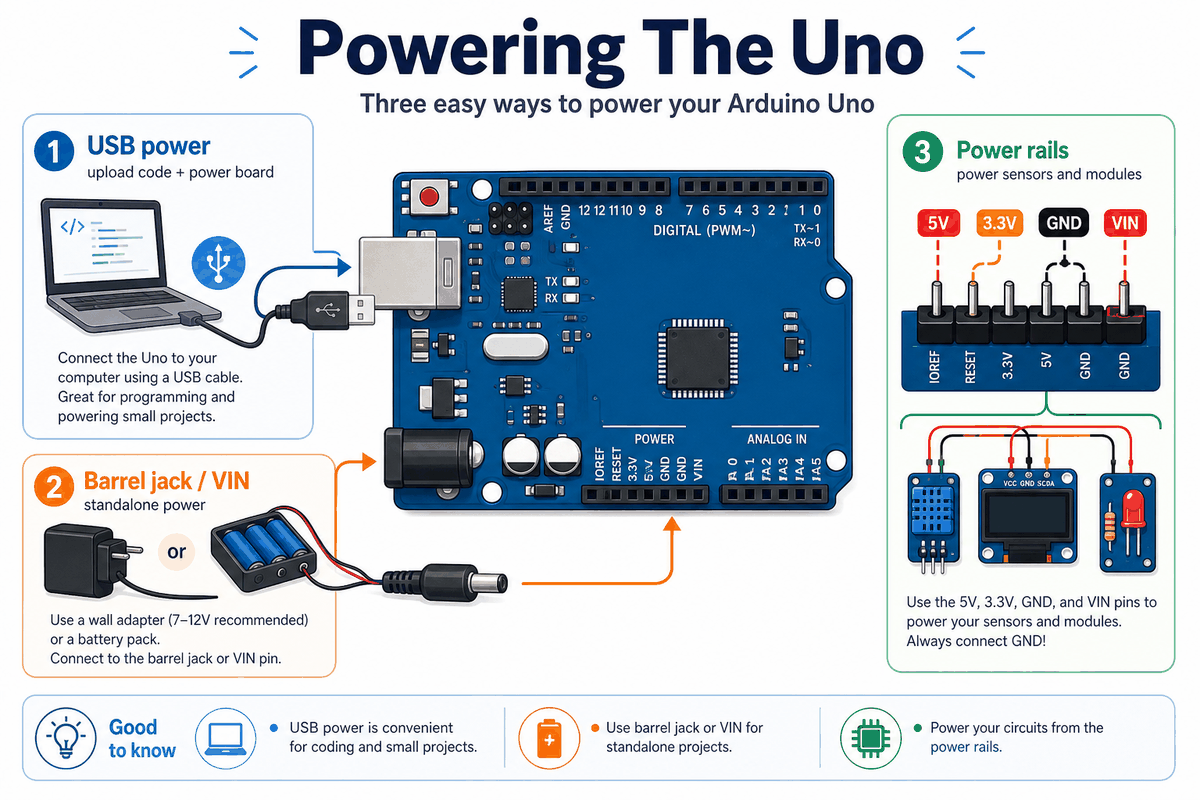
One reason the Uno is so beginner-friendly is that it can be powered in a few simple ways. You can plug it into USB while developing, use the barrel jack with an adapter, or feed it through VIN when you already have a regulated supply in your project.
USB Power
USB is the easiest option for learning because it powers the board and lets you upload code at the same time. That is why most first sketches, classroom demos, and serial debugging sessions start with a USB cable.
Barrel Jack And VIN
The barrel jack is useful when you want the Uno to run away from the computer. If you already have a battery pack or wall adapter, VIN gives you a straightforward way to keep the board running while the sketch continues to control your circuit.
5V And 3.3V Rails
Once the board is powered, the 5V and 3.3V pins are the rails you usually use to feed modules and sensors. Keeping those rails straight is important because many small breakout boards expect a specific voltage and will behave badly if the wiring is wrong.
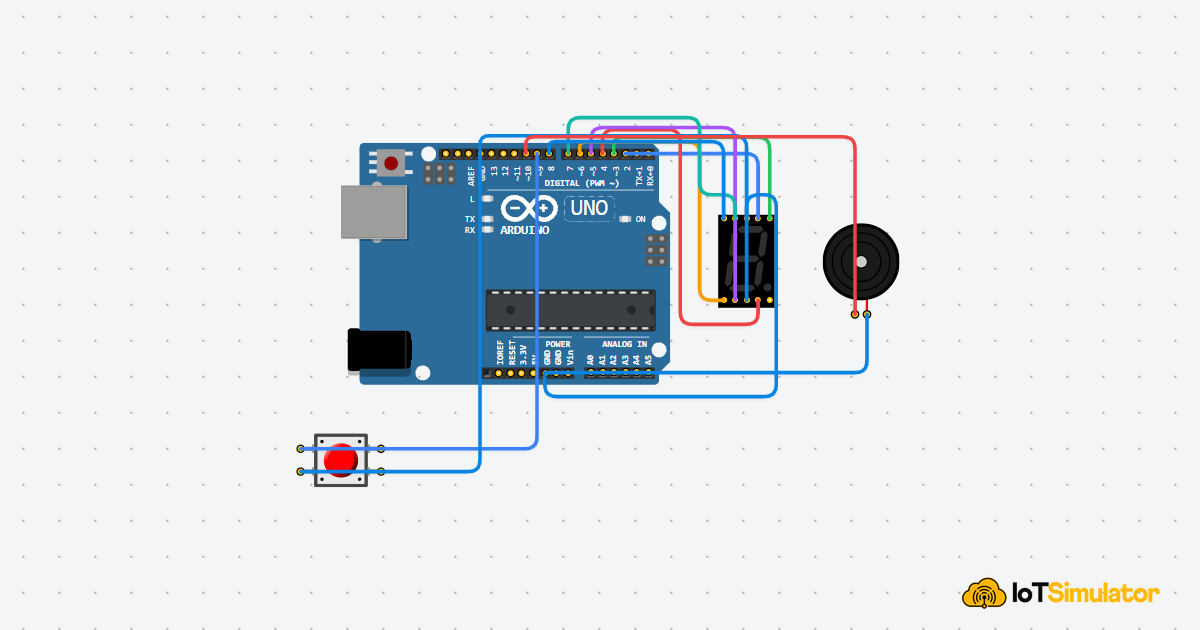
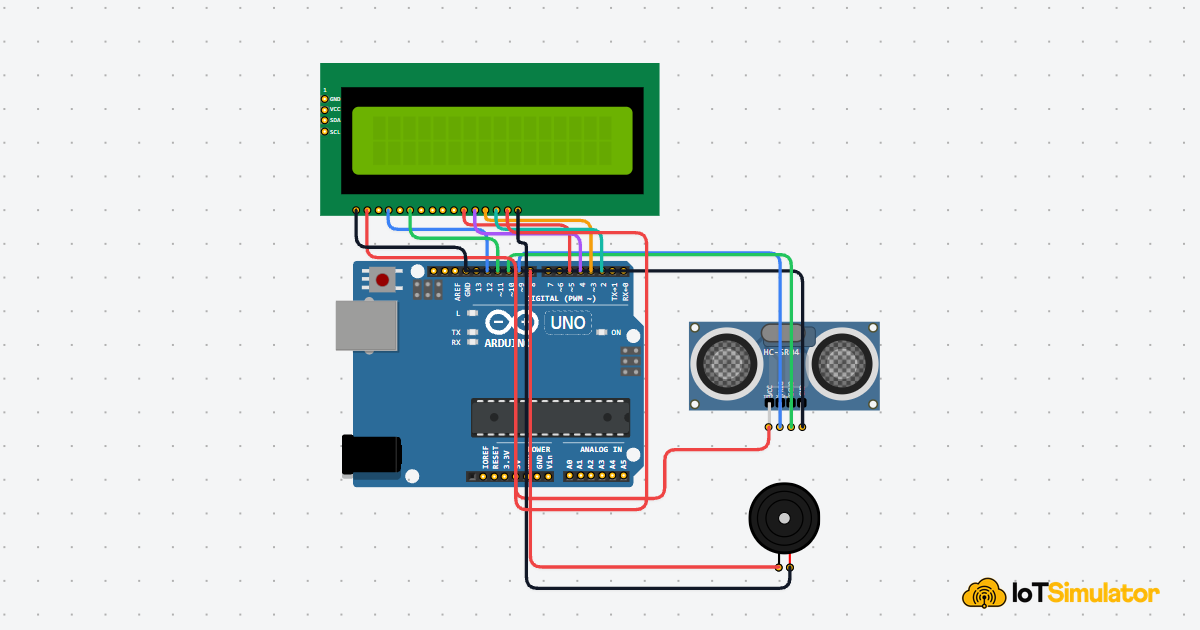
Common Components With The Uno
The Uno is often paired with simple, recognizable parts because they are easy to wire and easy to understand. These examples show the kinds of components beginners usually connect first.
The Uno is often paired with the same small set of parts because it is such a friendly starting point. Buttons, LEDs, buzzer modules, relays, servos, LCDs, OLEDs, and simple analog sensors all fit naturally with the board's pin layout.
Digital Parts
For simple on and off control, beginners usually start with LEDs, buttons, switches, and relay modules. These parts are easy to understand because they map directly to a digital pin state.
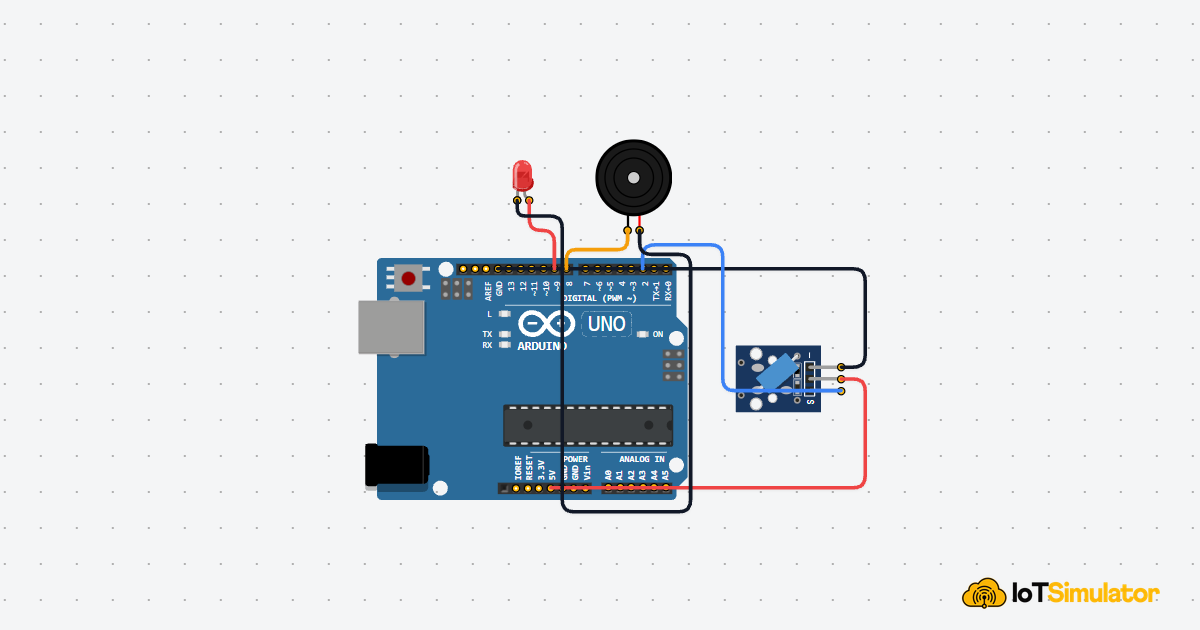
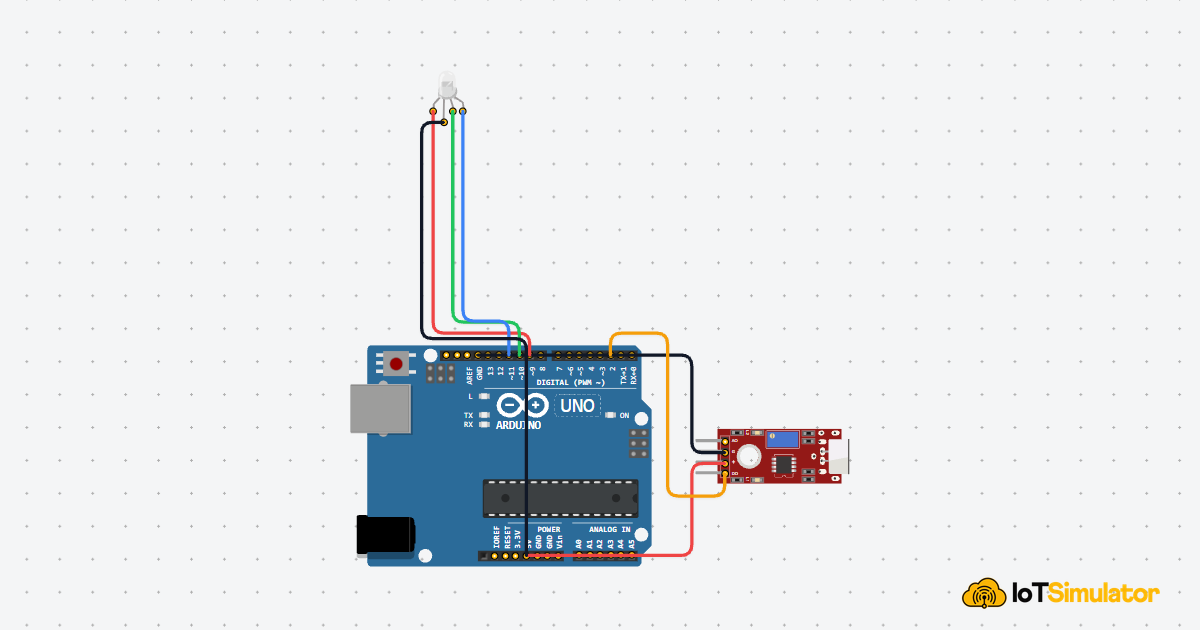
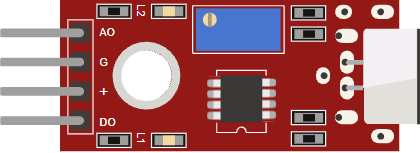
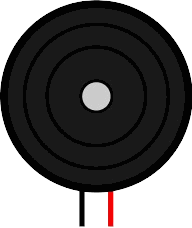
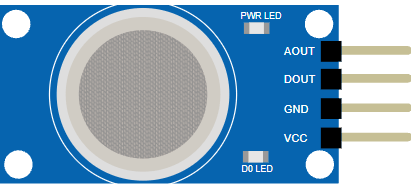
Analog Sensors
Potentiometers, light sensors, moisture sensors, and temperature modules are a good match for the Uno's analog inputs. These parts are helpful because they teach the idea of reading a changing value instead of only reacting to HIGH and LOW.
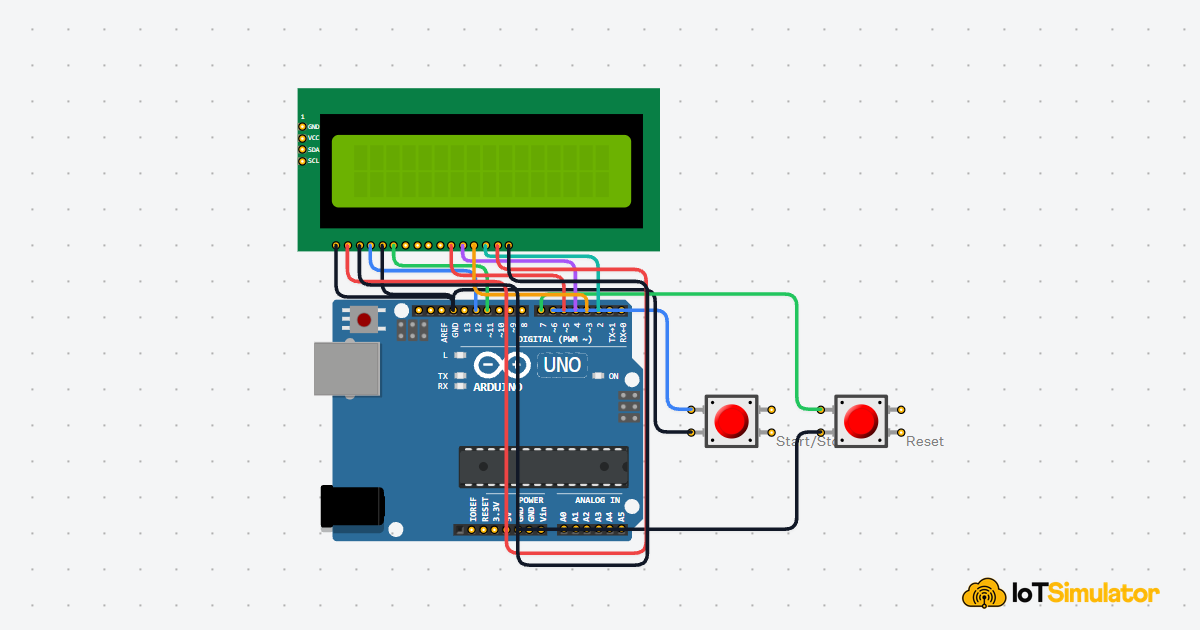
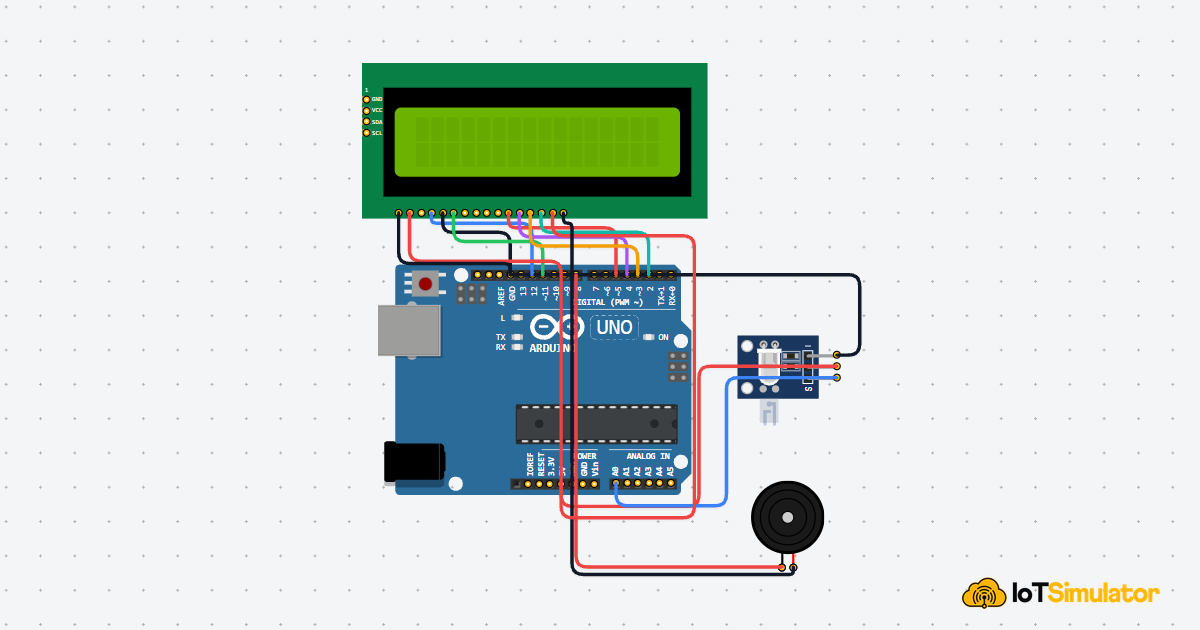
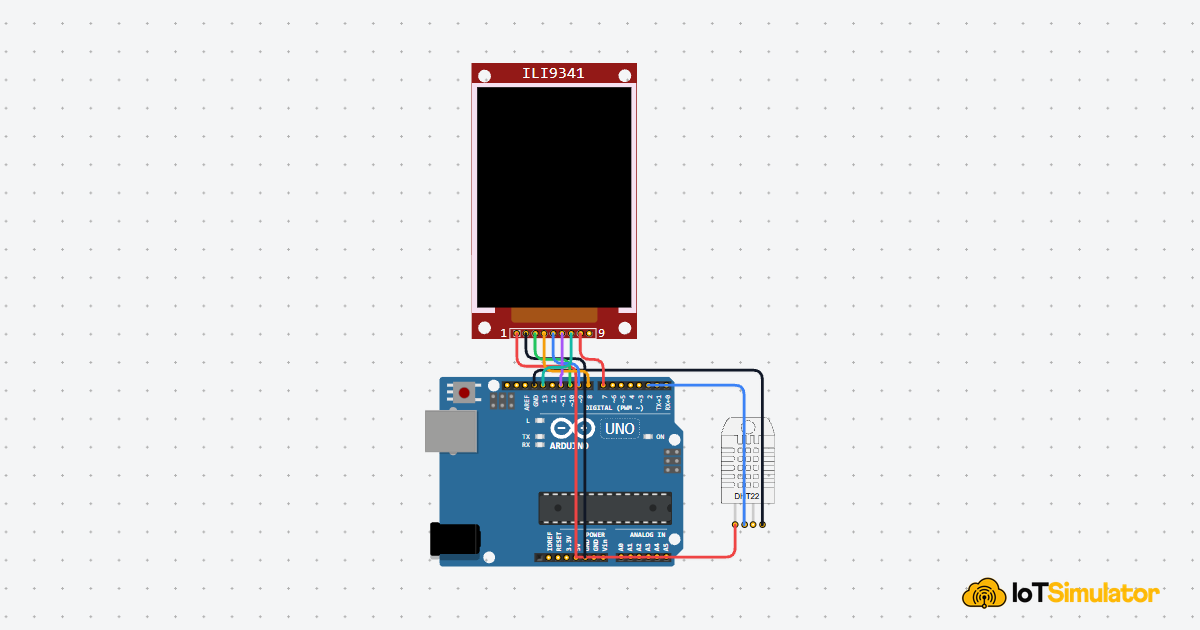
I2C Displays And Modules
Many beginner projects use I2C devices like OLED screens, RTC modules, and compact sensor boards because only two data pins are needed. On the Uno, that keeps wiring simple and leaves the other pins open for the rest of the project.
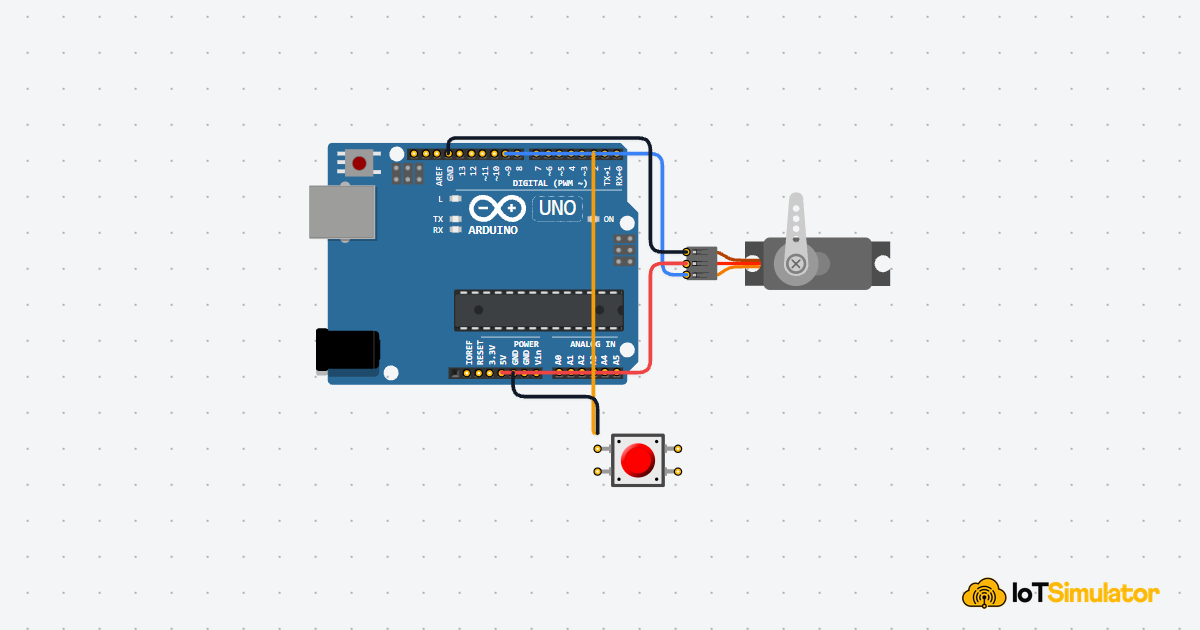
Motors And Motion Control
The Uno is also common in small motion projects with servos and motor driver boards. PWM-capable pins make it easy to adjust speed or position, which is why the Uno shows up in robot cars, pan-tilt mounts, and small automation builds.
Code
This example uses the built-in LED on pin 13 so you can confirm the board is alive, the sketch uploaded correctly, and the output pin is working.
That simple blink sketch is useful because it proves the board can upload code, control a pin, and print debug text at the same time.
How The Code Works, Part By Part
Let's break the sketch into smaller pieces so the flow is easier to understand and easier to modify later.
Setup
The setup block runs once when the board starts. Here, it prepares pin 13 as an output and opens Serial Monitor so the sketch can print status messages.
Turn LED On
After setup, the sketch drives the output HIGH. On the Uno, this turns the onboard LED on and gives you a clear visual sign that the code is running.
Turn LED Off
Then the sketch changes the output back to LOW. That ends the blink cycle and shows that the board can switch a pin both ways.
Repeat
The loop keeps repeating the same action so the LED keeps blinking. This repeat cycle is the part that makes Arduino sketches feel alive.
Wrapping Up
The Arduino Uno is still one of the best starting points for hardware learning because it keeps the workflow clear and familiar.
Once you understand its pins, sketch flow, and serial debugging, you can reuse the same pattern in larger projects with sensors, displays, motors, and other modules.