How to Play Happy Birthday on a Buzzer with Arduino
In this project you will connect a small buzzer to your Arduino and make it play the Happy Birthday tune. You will learn how sound works, how to turn numbers into musical notes, and how to write code that plays a melody — all without needing any musical knowledge.
Live project track
Have you ever heard a microwave beep, a phone ring, or a video game make a sound effect? All of those noises can come from a tiny component called a buzzer. In this project, you will use a buzzer and your Arduino to play the Happy Birthday song — and you don't need to know how to play an instrument to do it.
Why Do Numbers Make Music?
Sound is invisible, but it follows very predictable rules. When a buzzer vibrates 262 times per second, your ears hear a specific pitch — the note we call Middle C. When it vibrates 294 times per second, you hear a slightly higher note called D. Every musical note in the world is just a number: a specific vibration speed.
In music, these speeds are measured in Hz (Hertz). Low Hz numbers produce deep, low sounds. High Hz numbers produce bright, sharp sounds. So instead of telling the Arduino to "play a C note," we give it the number 262, and it vibrates the buzzer at exactly that speed. That is the whole secret behind making music with code.
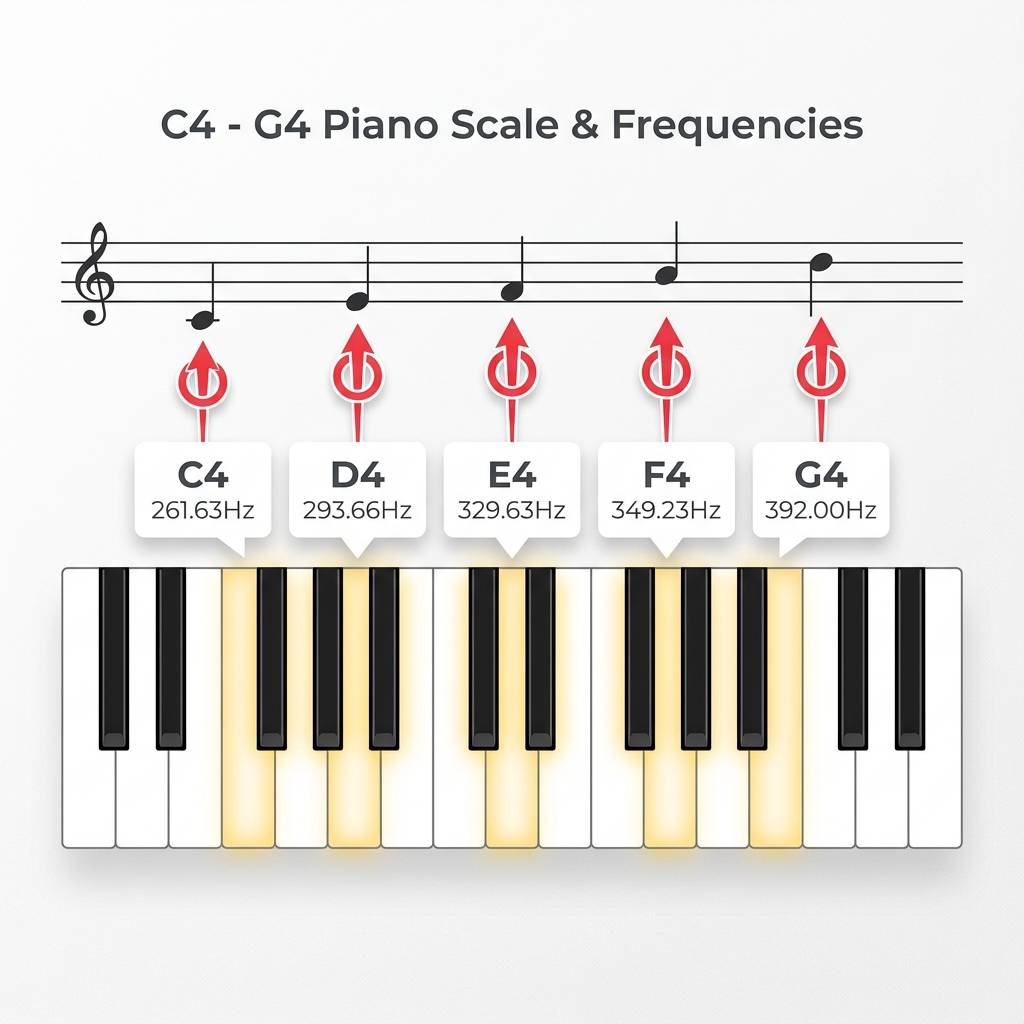
| Note Name | Solfège | Hz Value |
|---|---|---|
| C (Middle C) | DO | 262 |
| D | RE | 294 |
| E | MI | 330 |
| F | FA | 349 |
| G | SO | 392 |
Active vs Passive: Why the Wrong Buzzer Won't Play a Melody
Not all buzzers work the same way, and picking the wrong one means your Arduino will play nothing at all — or just one fixed tone forever. There are two kinds. An active buzzer has a built-in circuit that already knows what frequency to use. It just needs power, and it beeps at its own fixed pitch. You cannot change the pitch — it only has one sound.
A passive buzzer has no built-in frequency. It is just a vibrating disc that waits for the Arduino to tell it how fast to vibrate. Because we control the frequency, we can play any note we want — which is exactly what a melody requires. For this project, you must use a passive buzzer.
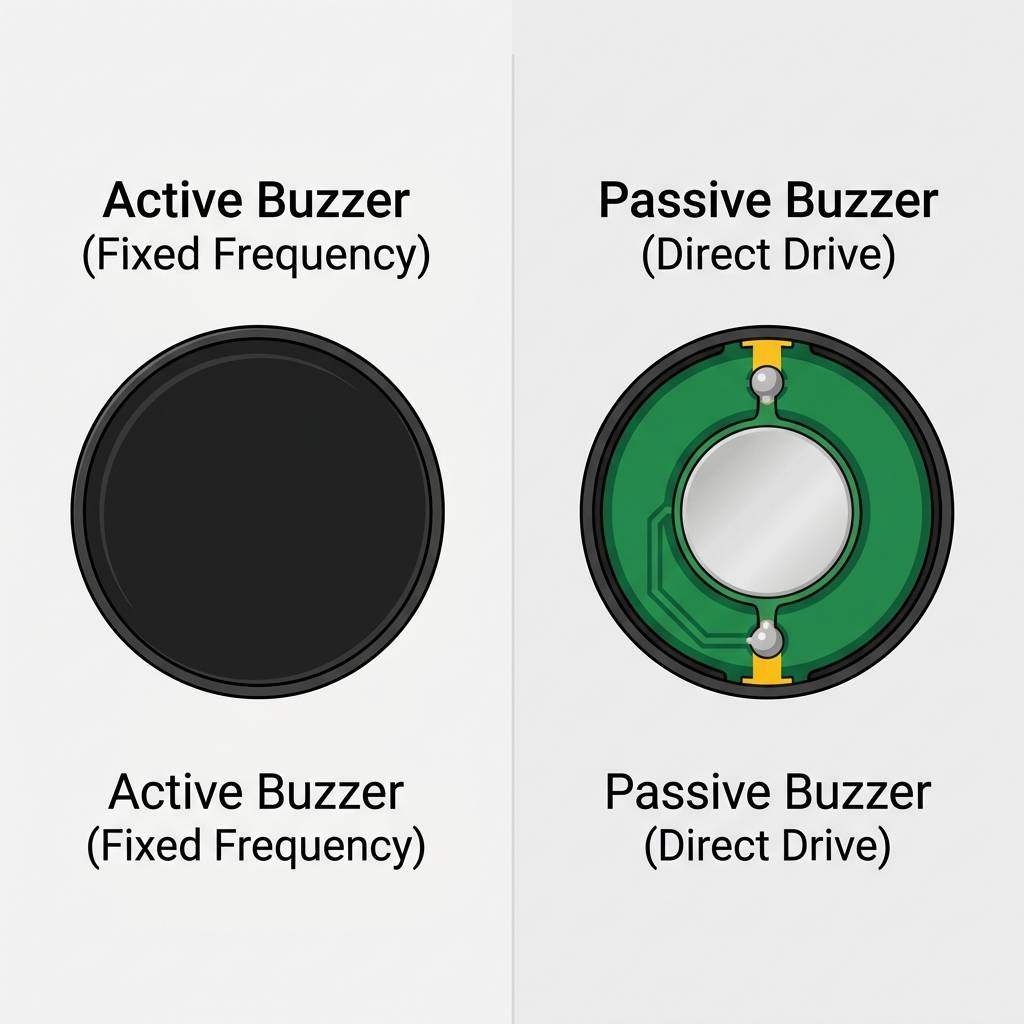
A quick way to test which type you have: connect it directly to a 5V and GND pin. If it beeps on its own without any code, it is active. If it stays silent, it is passive — and that is the one you want.
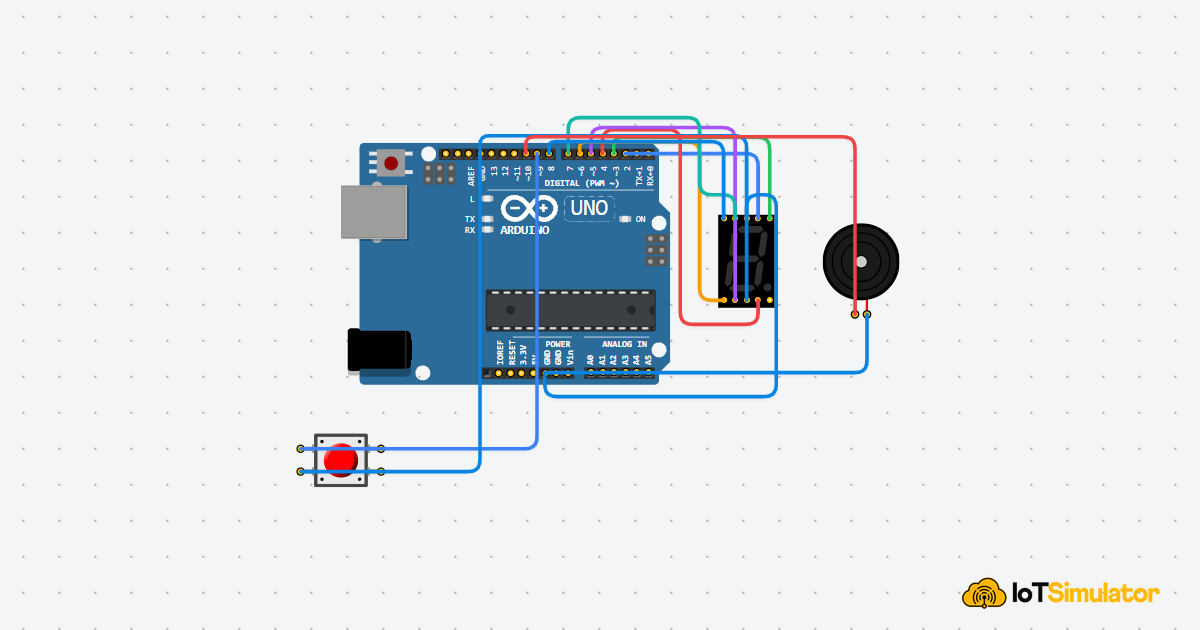
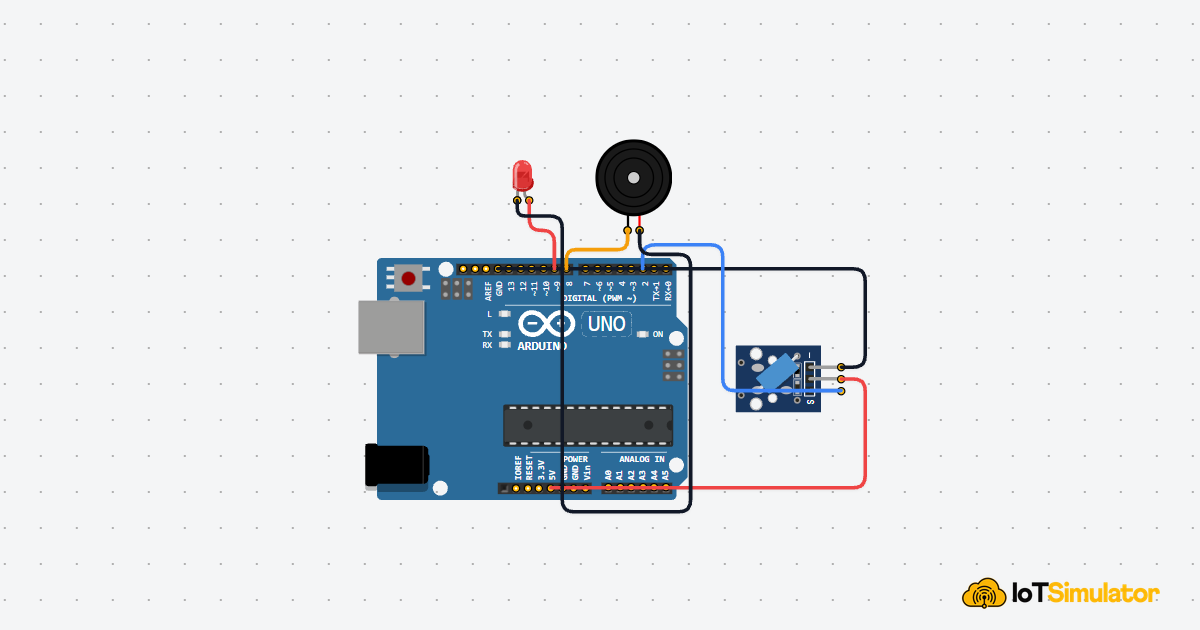
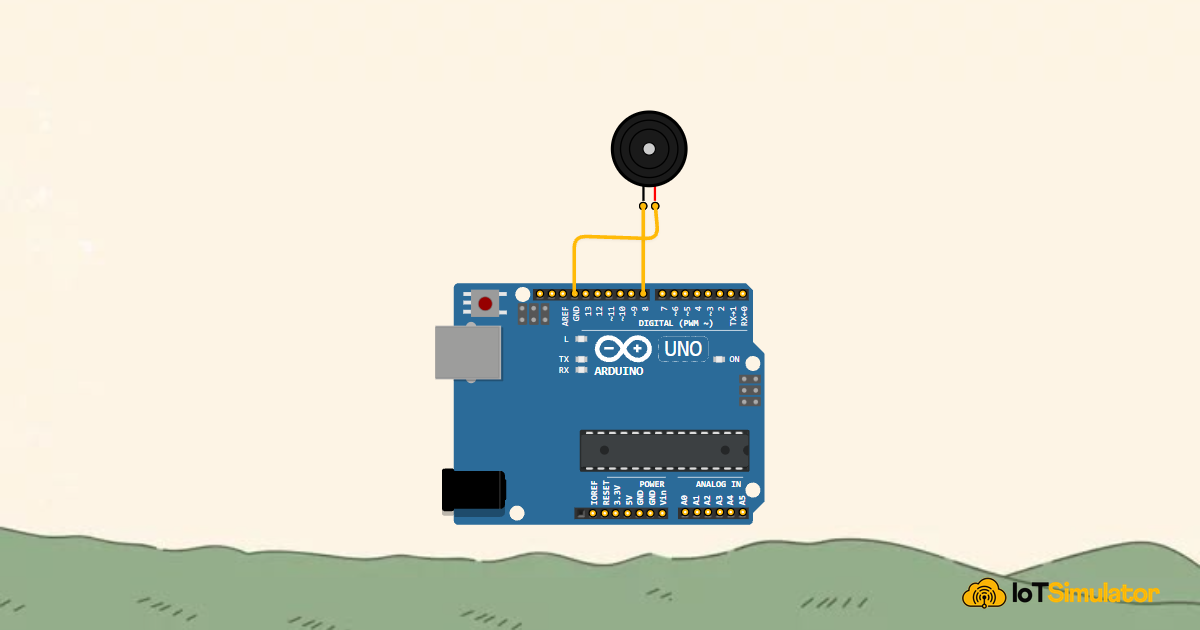
The Two-Wire Setup That Powers a Song
The buzzer has two legs. The longer leg (marked +) is where the signal comes in — connect this to pin 8 on the Arduino. The shorter leg is the return path — connect this to GND. That is the entire circuit. No resistors, no breadboard required. Two wires, and you are ready.
The Arduino sends the melody signal through this pin.
The return path that completes the circuit.
We chose pin 8 because it is a standard digital pin with no special conflicts. The Arduino can drive the buzzer directly — no extra power source needed for a small passive buzzer like this.
Turning a Frequency List Into a Melody
The code works by storing the song as two separate lists. The first list is the melody — a sequence of note names in the order they should play. The second list is the timing — a number for each note that says how long to hold it. The Arduino goes through both lists at the same time, playing each note for the right duration.
Why We Give Notes Nicknames Instead of Using Numbers
At the top of the code, we use #define to give each frequency a short name. NOTE_C4 is just a nickname for 262. This matters because the melody list would be impossible to read if it were full of raw numbers. Writing NOTE_C4, NOTE_C4, NOTE_D4 looks like music — it maps to the syllables "Hap-py Birth". Writing 262, 262, 294 tells you nothing at a glance.
Why the Song Needs a Gap Between Every Note
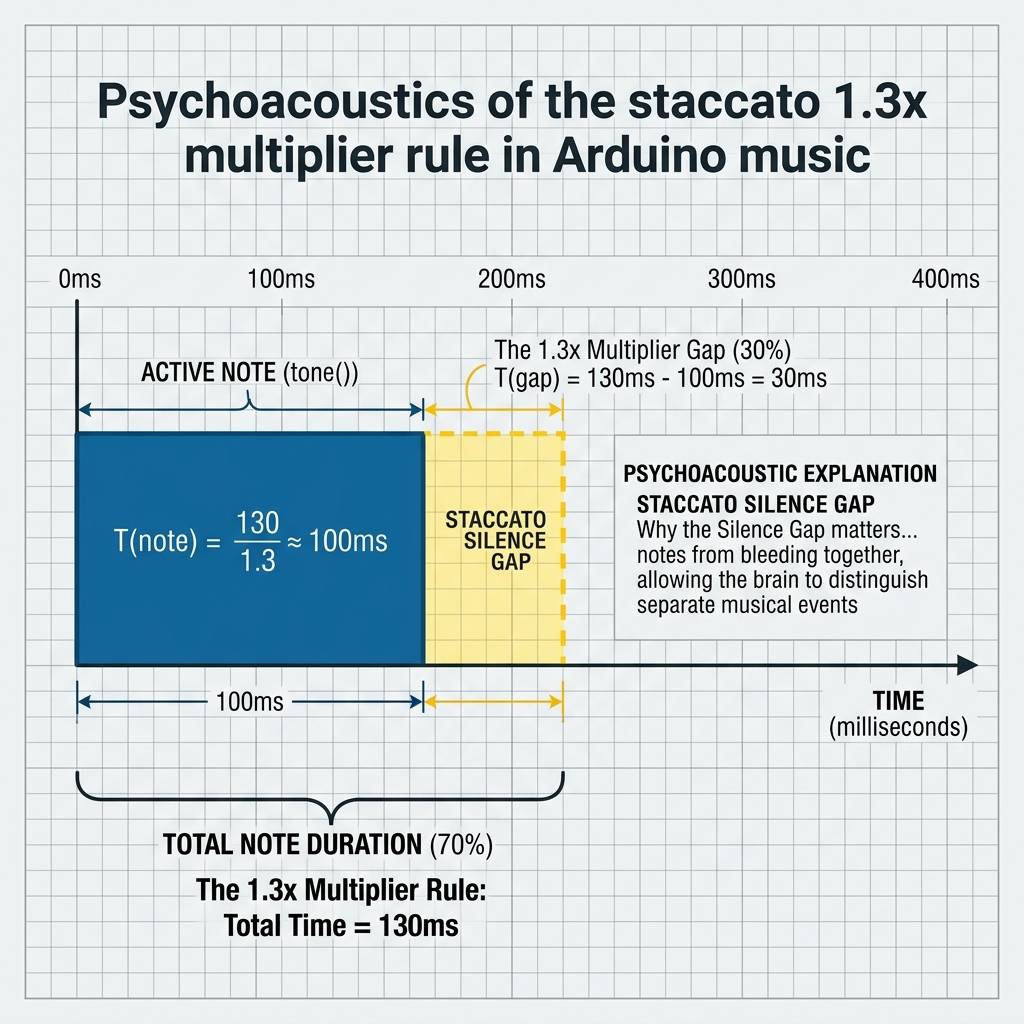
Here is the part most beginners miss. When you call tone(), the Arduino starts the buzzer vibrating — but it does not wait for the note to finish. It immediately moves to the next line of code. If you only added a delay() equal to the note length, notes would run directly into each other with no separation, and the melody would sound like one continuous blur instead of distinct notes.
The fix is to wait 30% longer than the note duration before playing the next one. That short silence is what your ear needs to hear two notes as separate sounds. The * 1.30 multiplier in the code creates that gap. Change it to * 1.0 and you will immediately hear the difference — the melody starts to blur.
Why the Song Lives in setup() and not loop()
You might notice the entire melody loop is inside setup(), not loop(). This is intentional. loop() runs forever and would repeat the song immediately after it ends, with no pause — which gets annoying fast. By putting the song in setup(), the Arduino plays it once when it powers on, then stops. If you want it to repeat, you can move the code into loop() and add a long delay() at the end.
Making It Your Own: Changing the Tempo and the Song
The number 1000 in 1000 / noteDurations[i] controls the overall speed of the song. Change it to 500 and everything plays twice as fast. Change it to 2000 and the song plays in slow motion. This one number is your tempo control.
- Add more notes to the
melody[]array to include the rest of the Happy Birthday lyrics. - Try a different song — look up the Hz values for "Twinkle Twinkle Little Star" and write them out.
- Add an LED that flashes on each new note by adding a
digitalWritecall inside the loop.